
Hydronic Double Boiler Replacement
November, 2023
A Long Overdue Change
The builder’s very sub-standard boiler installation. Not only is the plumbing atrocious, but the hard copper pipe formed a cage around the boiler so it can’t be removed without cutting the copper.
After eight years of failure, turmoil and confidence destroying use, we finally made the long overdue decision to replace the hydronic boilers. It wasn’t so much that the Webasto boilers installed by the builder were inadequate, you understand. Far from it. Webasto’s products are absolutely first class. Rather, it was the installation itself that was a disaster. A full account of that nightmare can be read here.
As a result of the builder’s installation failure, which damaged the boilers internally, we were plagued with uncertainty and hardship. In the end, this lead to constant stress whenever we used the truck, particularly in winter, as we never knew when another problem would surface. In late summer of 2023 it finally came to a head. The passenger side boiler began emitting a loud sound from the exhaust outlet like that of a very loud trumpet. It was bad enough for us when inside the habitat, but step outside and it could be heard 100 metres away. Something had to be done.
After trying for weeks to determine the problem, and changing intake and exhaust piping to see if that would help, we finally gave up and called our contact at Webasto. He put us on to their head tech person, and the result of the consultation saw us having to tear the boiler apart to see what it looked like inside. Yes, it was a mess.
A good portion of the burner mesh is destroyed and this produces an uneven flame.
This is the distorted and cracked burn chamber. It causes a vibration in the airstream that is amplified by the exhaust pipe.
The noise was being caused by a burner chamber that was cracked and distorted. Other damage included a badly corroded heat exchanger, and a burner screen that was pretty much destroyed. All this damage can be attributed to the builder. They filled the system with the wrong hydronic fluid, and at double the required concentration. The fluid they used was not formulated for aluminum boilers, and this caused corrosion to all the internal parts. The full strength concentration caused innumerable overheating failures, and multiple damaged sensor replacements. Fast forward seven years, and the internal damage that was exacerbated by years of use saw the long limping boiler literally howling in pain.
We had to make a choice…buy replacement parts to rebuild the old boilers (we’d have to do both boilers), or bite the bullet and replace them with new ones. The replacement parts were going to cost over $1,000.00 for each boiler. More than half the cost of a new one, and that didn’t include the labour that we ourselves would have to provide. There were no Webasto repair facilities near us. We made the executive decision to buy new ones. But here’s the thing…did we really want to purchase new Webasto boilers?
Despite the quality of the Webasto brand, and the exceptional personal attention we got from the people at Webasto North America, we just couldn’t continue using the Webasto product. As stated before, there is no local Canadian support for the product aside from a Cummins distributor that is essentially a very over priced parts outlet who carries no inventory. (It was cheaper to buy parts from the U.K. and ship them over here than to buy local or from the U.S.) None of the local shops that sell and “service” the Webasto product line for the trucking industry had ever seen our Thermo Pro 90 model, and none were willing to work on them. The closest dealer that would help us was a four hour drive away, across an international border.
Our old boiler on top compared to the new Espar boiler. What a difference in design and simplicity.
So we started asking around to other expedition truck owners, and those in the yachting industry where these type of boilers are often used. The feedback was mildly negative on Webasto, mostly because of their louder noise when running, but quite positive on another German boiler maker named Eberspaecher. They make the Espar brand of boilers etc., and to our delight, made a boiler almost identical to our Webasto in size, shape and power. So it could almost be a plug and play solution. What’s more, they had a distributor, a major stocking distributor that is, who was only a half hour drive away. When we visited them, and looked in their warehouse, they had perhaps as many as twenty of the boilers we would choose sitting on the shelf. They also had a complete parts inventory, and could service the product right on the premisis. Although we had a strong feeling of disloyalty to Webasto for all they had done for us, we had to choose the best solution for us. So we made the move to the Eberspaecher product. It would cost more, since now we would also have to replace the plumbing, wiring, fuel line, fuel pump, and controllers. But we would be starting totally fresh with everything new, and frankly, get a proper installation this time because we’re doing it ourselves.
Making the change
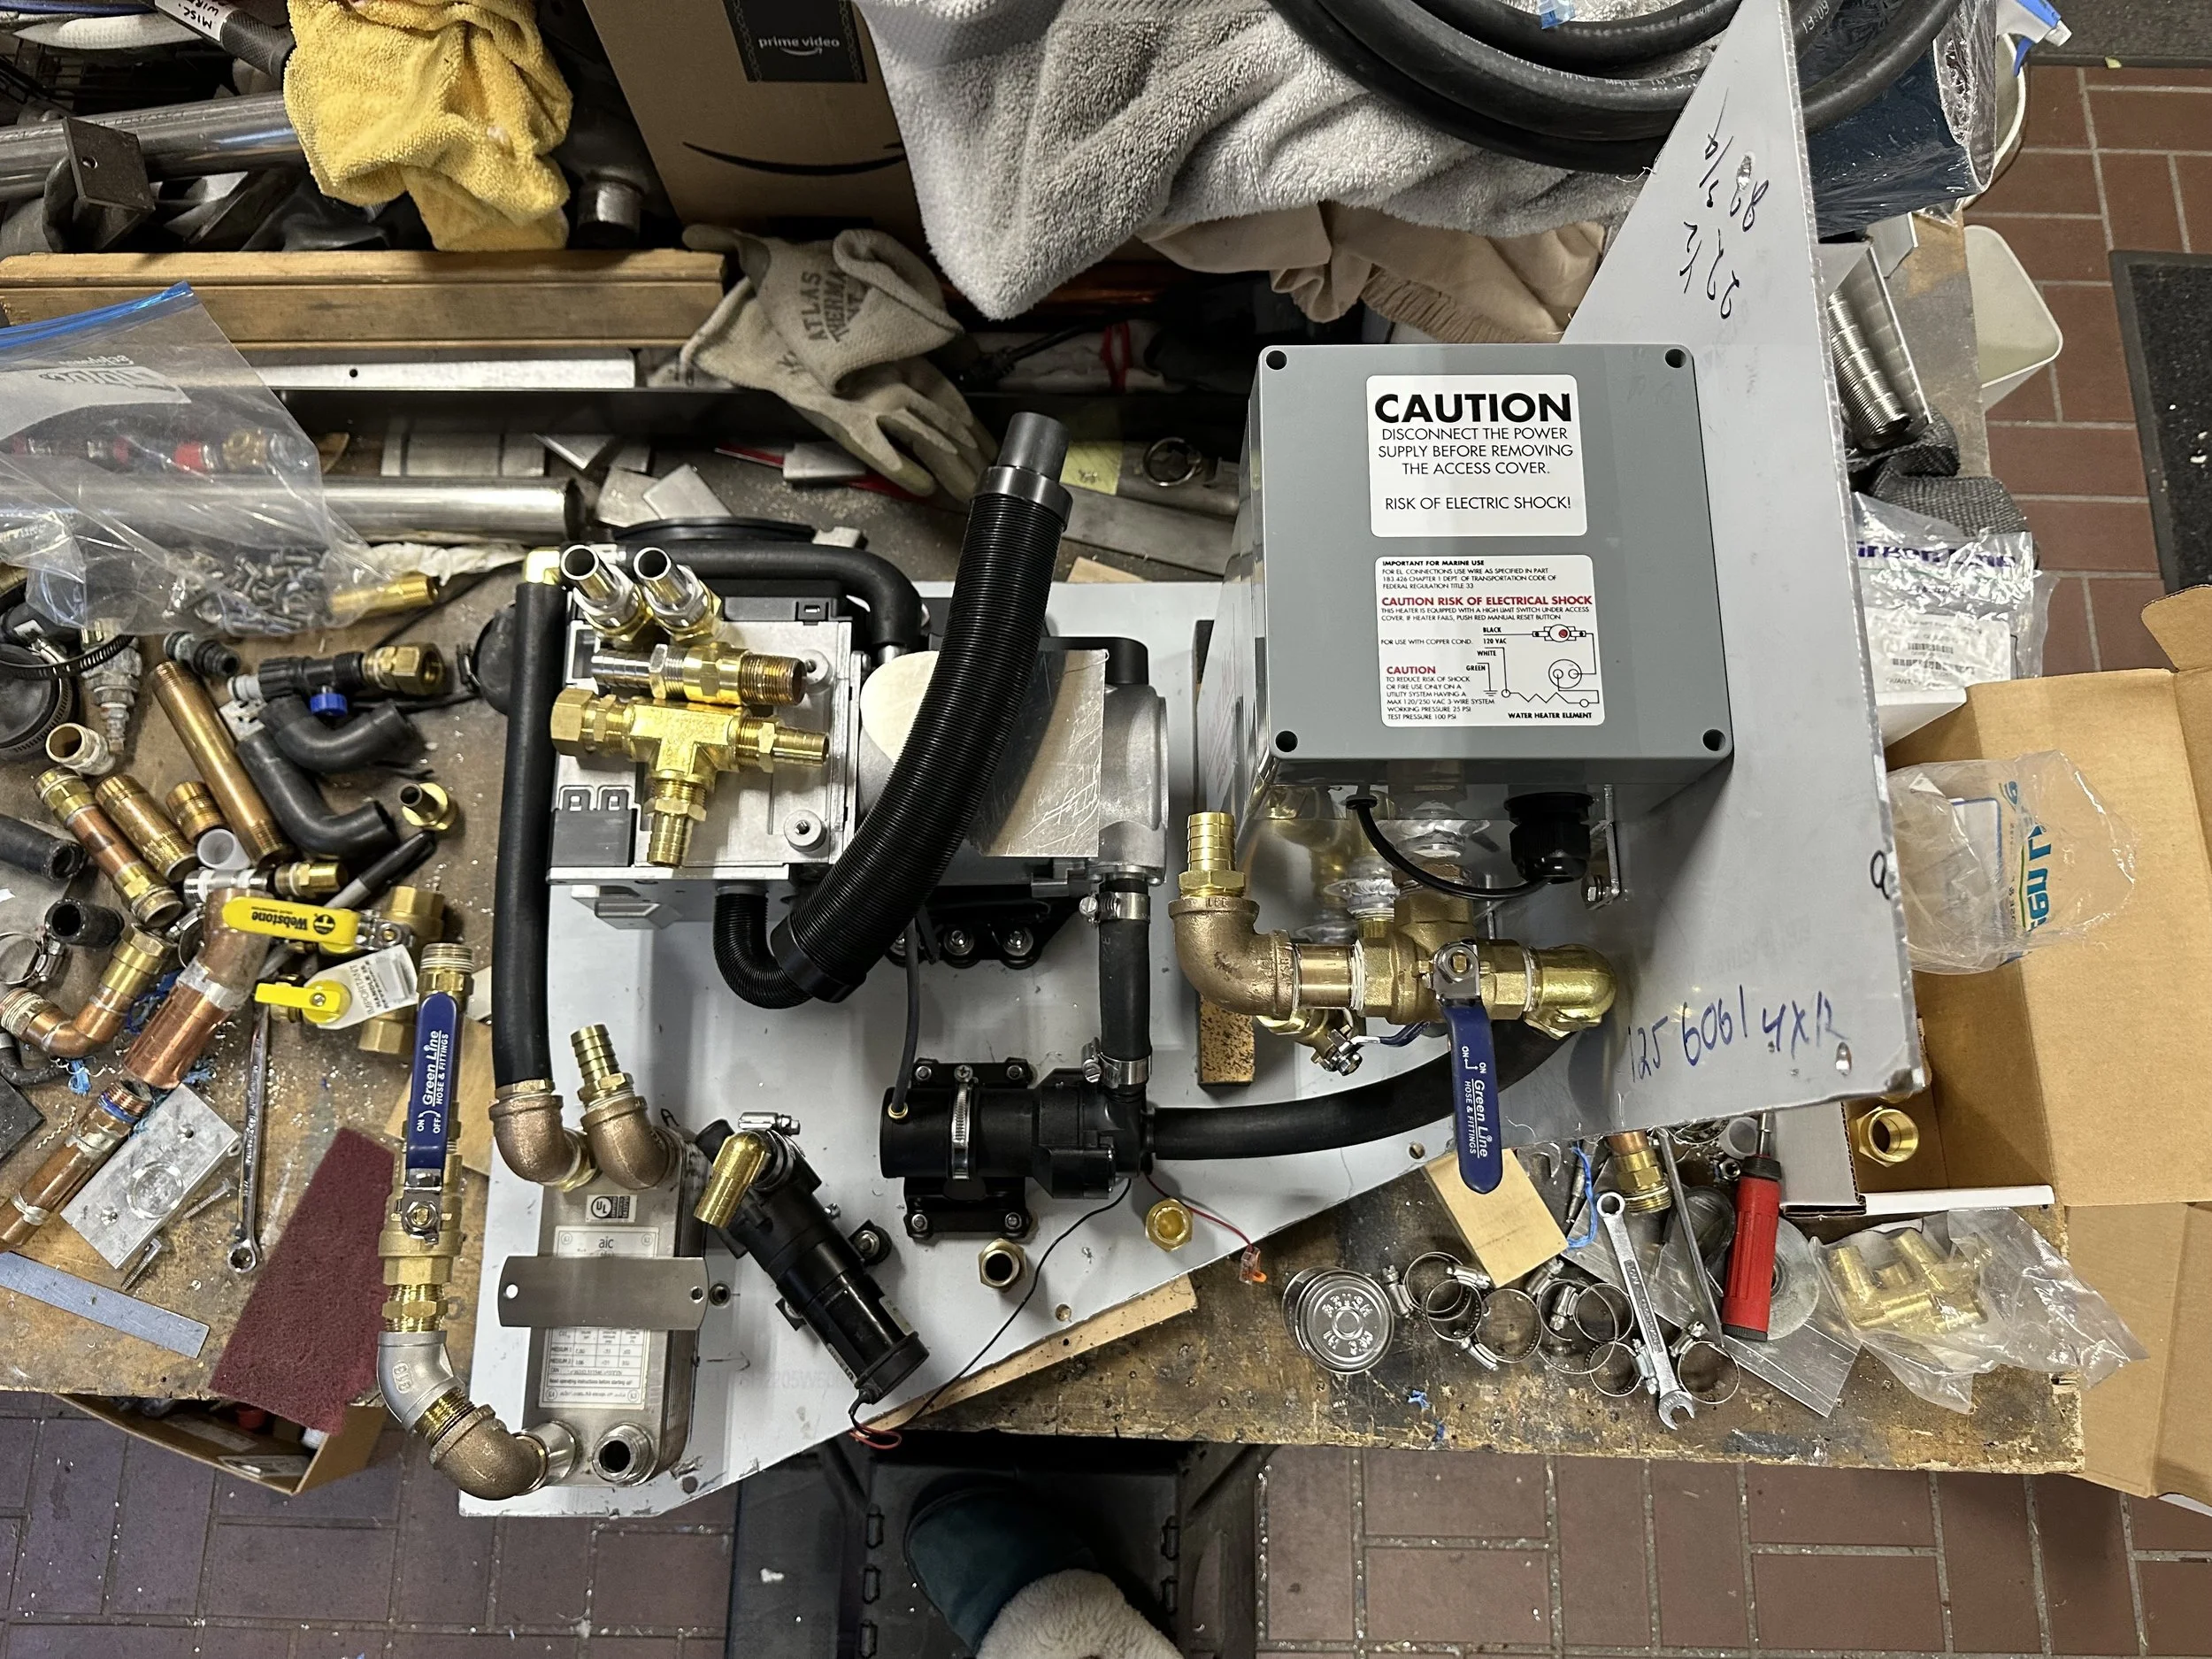
The new boiler and “kit” that came as a package deal. We needed two of these.
Unfortunately for us, the project entailed a bit more work than just a simple remove and replace. In fact, a great deal more work. To get the driver side boiler out we had to literally cut out all the copper plumbing that the plumber had installed (the plumber that was fired half way through our build), and all the connections to the related hydronic system. The passenger side boiler was less work, but also required a complete re-work of all the plumbing. Finally, here was a chance to replace the portion of the heating system that didn’t even match the schematic provided by the builder. Our build had by-pass loops that were theoretically designed to enable one to remove a boiler while the system still ran using the other boiler. But in reality, the loops they installed did nothing of the sort. Yup, total morons.
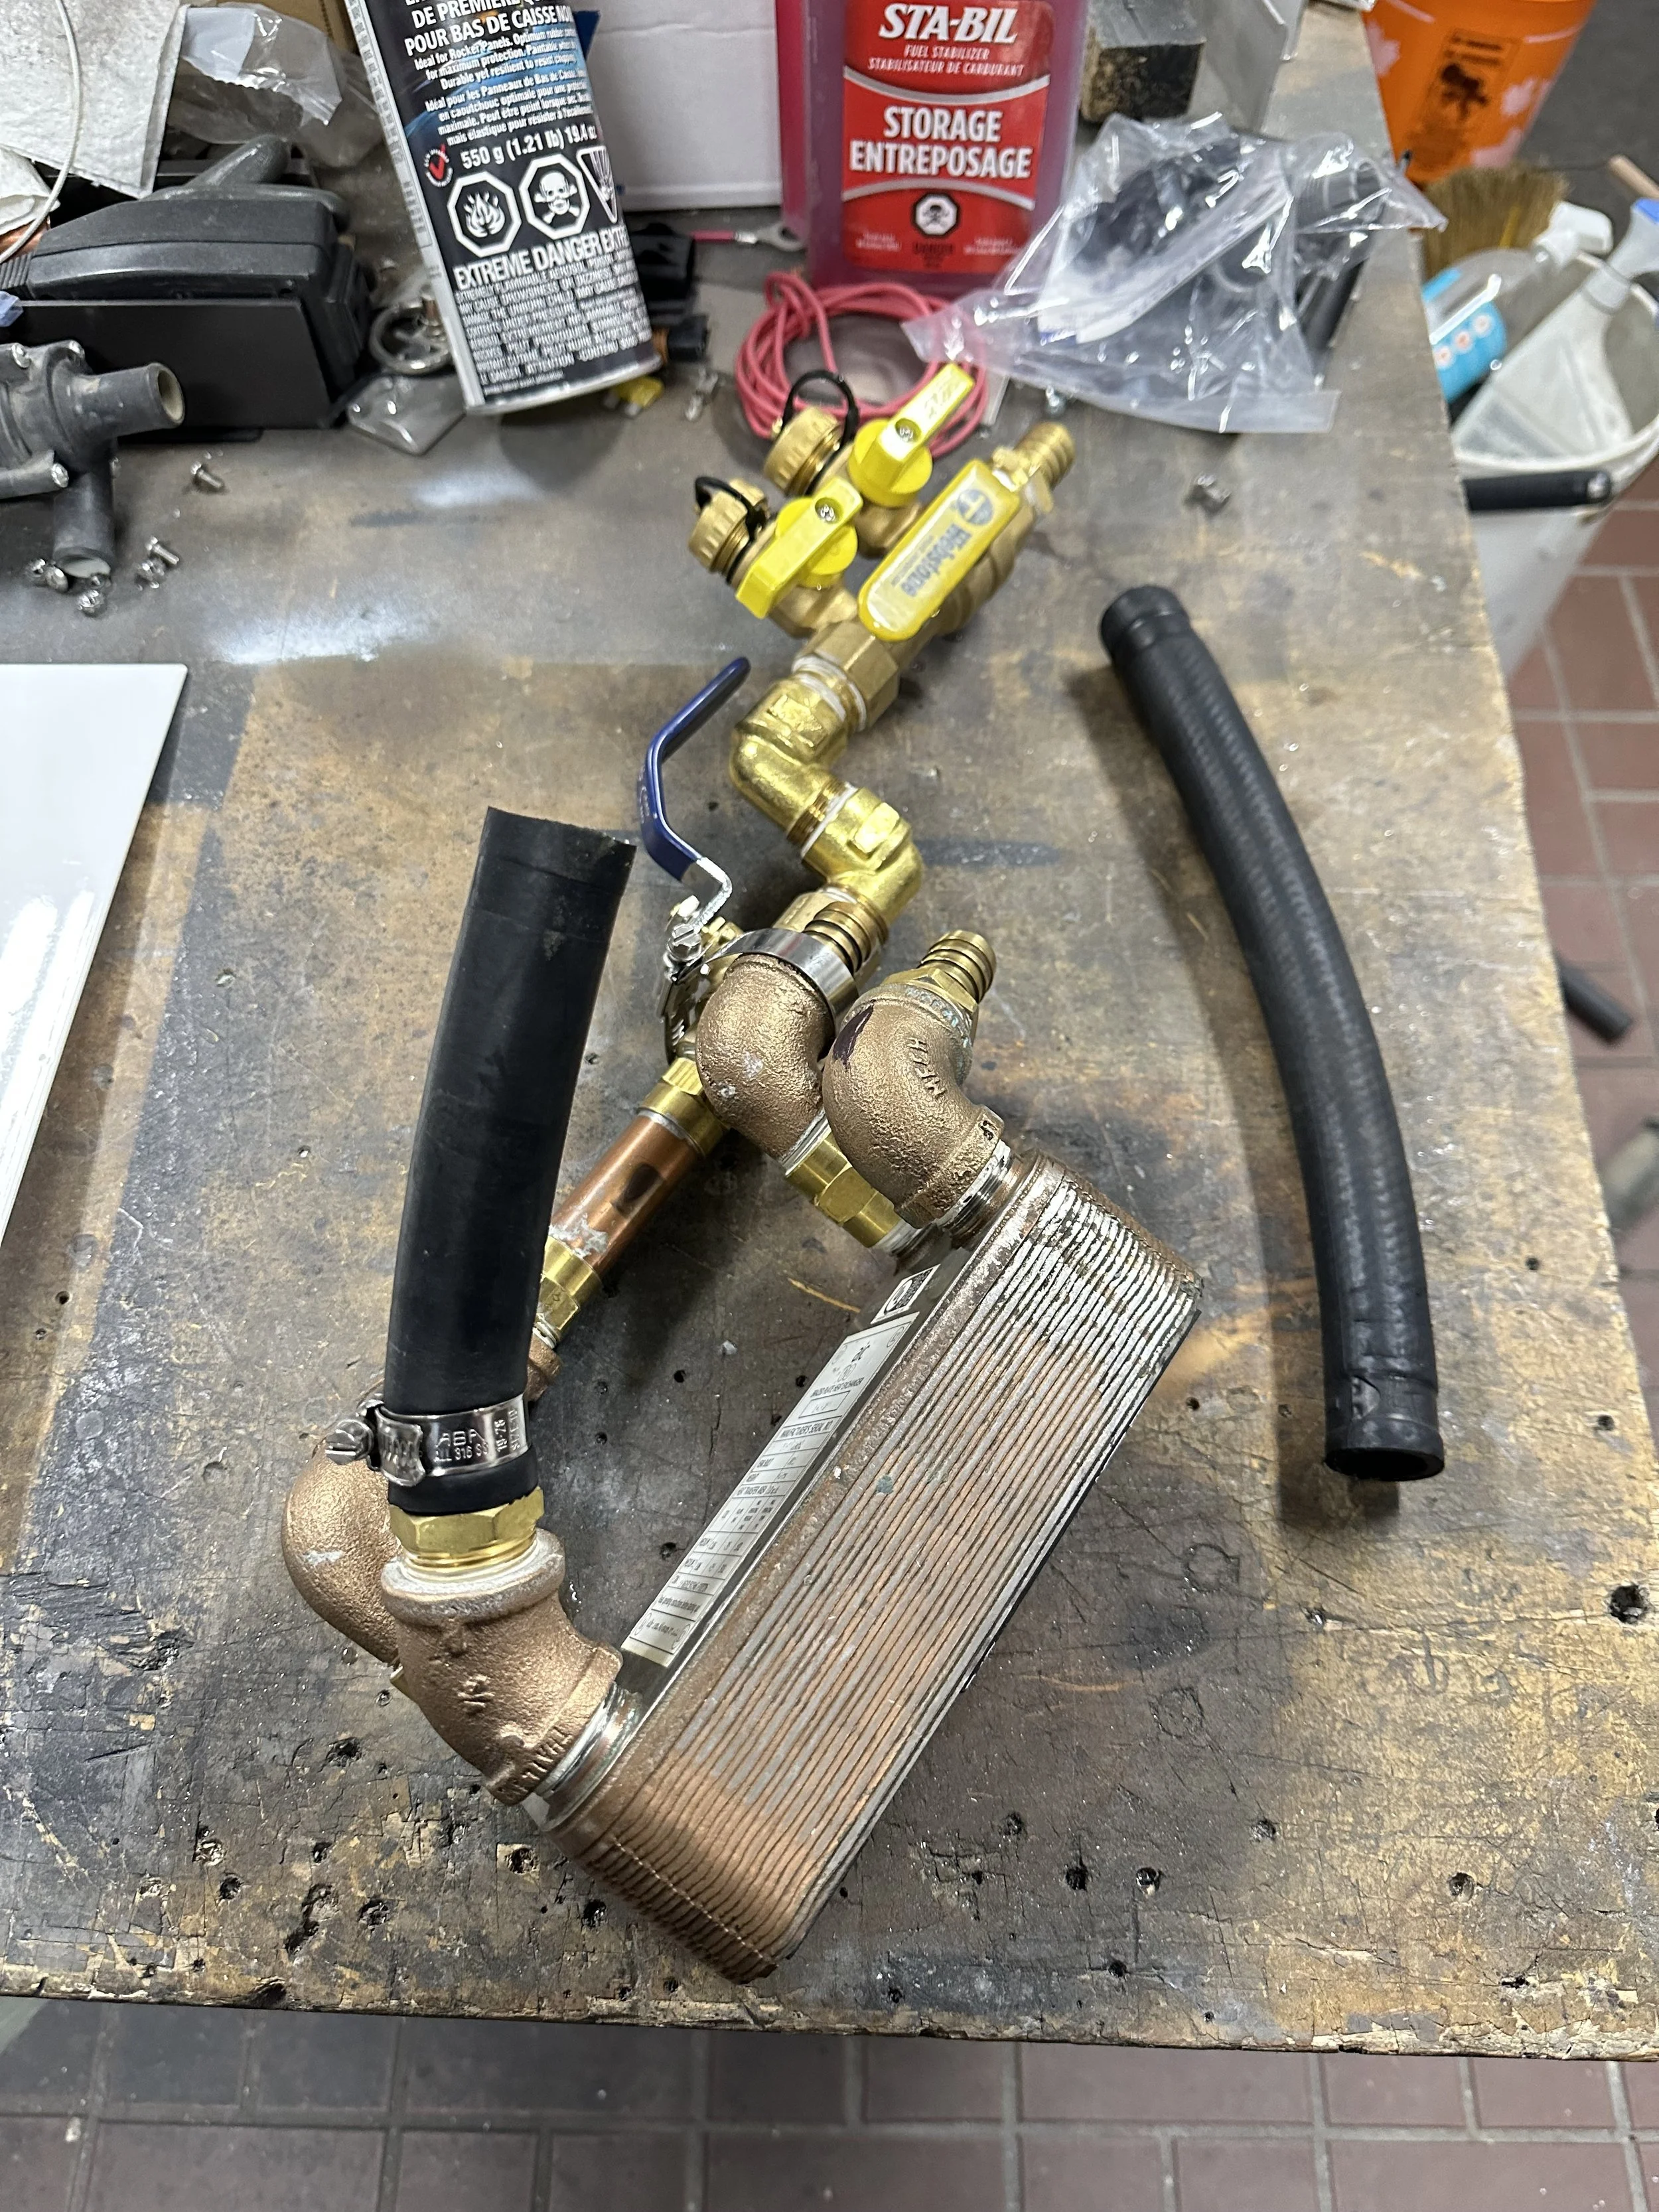
All this came out of the driver side boiler compartment, and it’s all being scrapped.
So with gritted teeth, we grabbed the reciprocating saw with a metal cutting blade, and started hacking away all of the copper. Along with it, out came the expansion tank, the overflow tank, the heat exchanger for the engine heat circuit and all the wiring. None of it was of any use because we were changing brands, so all Webasto related gear had to be replaced. This included the Webasto “smart controllers” located on the habitat control panel.
We also ended up replacing all the power and control wiring because the new Espar boilers drew more electrical power at startup than the old gear, and kept blowing fuses when trying to fire up. The Mastervolt fuse block that supplied the electrical power to the old boilers only had 15 amp fuses, where the new boilers needed 20 amps. In reading the specs for the fuse blocks it stated that the fuse block circuits were actually only 10 amps, not 15. So who put the 15 amp fuses in the 10 amp fuse block? Oddly enough, when the project was finished, the new boilers used less electrical power. So they could run longer before starting to deplete the batteries. Along with the rest of the parts, the two fuel pumps and associated wiring were also replaced.
All of the copper piping was replaced with heavy wall rubber tubing and brass fittings. This made it much easier to build the new system, but also made it very simple to disconnect and remove the boiler if it needed servicing in the future. I could literally disconnect and remove a boiler in 6 minutes, and didn’t have to drain the system of hydronic fluid to do it. Imagine that.
Passenger Side Boiler Replacement
This side was the easier to retrofit than the other for several reasons. First, there were fewer components to install on this side, and the compartment was wide open. We didn’t have to struggle around the grey water tank like on the driver side.


Driver side boiler replacement
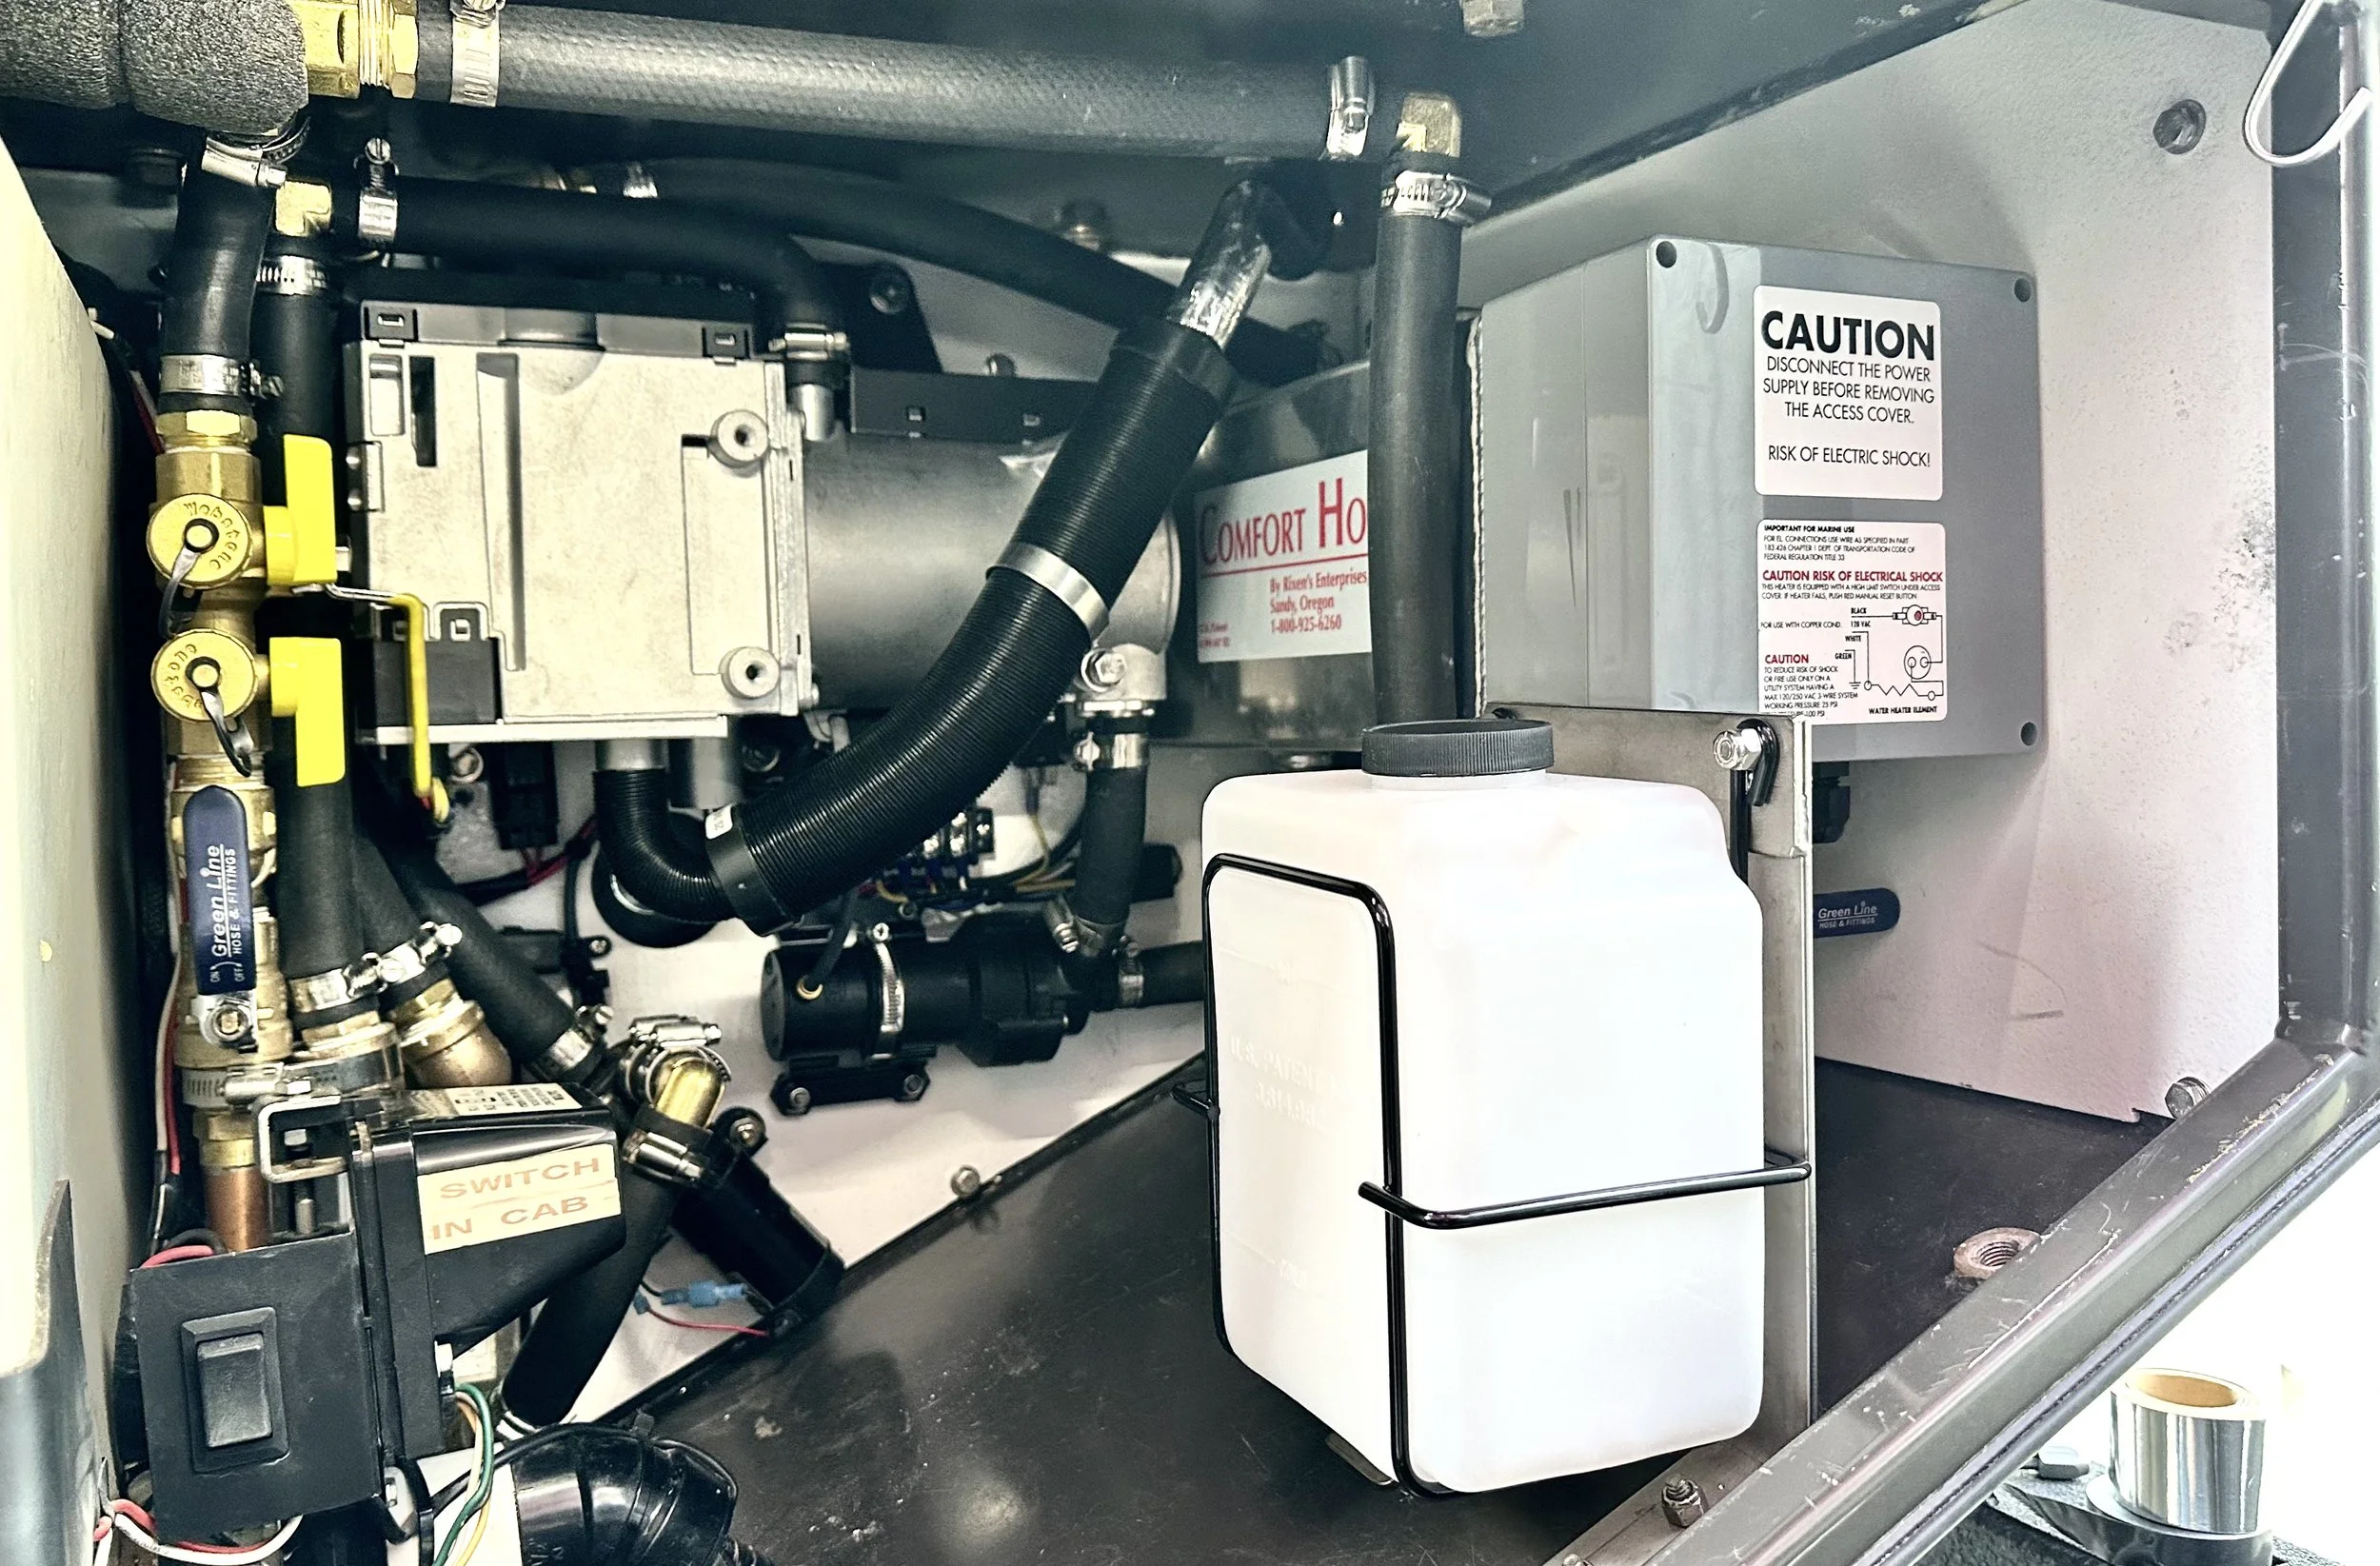
This shows the Comfort Hot tank which combines the expansion tank function with that of an electric boiler for habitat heating.
As mentioned above, the driver side retrofit was a much bigger job. The grey water tank takes up half of the compartment, and we were also adding to this side, a new expansion tank that also functioned as an electric boiler for when we were plugged into shore power. But is was a different shape and size compared to the old cylindrical expansion tank. That alone made it more challenging. But it also had a fairly large electrical junction box on one end. This is needed to connect the electric heat element into the 120 volt electrical system of the truck, and the 12 volt switching control on the habitat control panel. The Comfort Hot tank is a significant upgrade to the old cylindrical expansion tank, and aside from the electric heat element, it has much improved plumbing connections.


The Last Connections
We mounted the two new fuel pumps on a plastic backing board so it could easily be installed behind the habitat entry steps, right beside the diesel tank.
With the two boiler compartments finished, the last job was to mount the fuel pumps within a metre of the truck’s diesel tank. (The builder mounted the old ones near the back of the truck, which was wrong and could have caused problems.)
To connect the boilers to the fuel pumps and the new EasyStart timers, the wires and fuel line from the boiler compartments had to be run up to the front of the truck. We worried that there wouldn’t be enough length, especially for the driver side boiler which was the furthest from the diesel tank, but good karma must have existed for us as we had about a metre of wire, and half a metre of fuel line to spare. Phew!


A Big Job Done
With the double boiler retrofit completed, all that remained was to connect the electrical lines inside the control box. Since we needed to replace the controllers from the old Webasto boilers with new ones for the Espar boilers, we took this opportunity to replace another of the long disliked features of the truck…the actual control board itself. Use this link to go to the new control board page for that project.