

Interior Decor Upgrade
Better Than A Therapist
The change in the decor of the cabin interior was an absolute "must do". In part, it was for functionality reasons. But more importantly, it was necessary for good mental health. Here's why.
We ordered the cabin with the shiny white interior provided by the wall panels themselves. We didn't have many windows, so we thought that the white interior would be bright and up-lifting. Well, we were wrong.
After living with the interior for more than a year, we realized that the white interior was not only stark, but it also reflected the glare from the exposed lenses of the lights in the ceiling. This glare causes the iris of the eyes to close, which lets in less light thus making the interior feel dark.
The colour palette for our interior.
A worse problem still, was that the white interior affected our mood when inside the truck. We could see all of the 1" x 1" white painted angles that were glued, and in some cases screwed, to all the corners and edges to "finish" the connections between the wall panels. Since this looked unfinished to us, perhaps even unprofessional, every time we entered the truck and saw them, they made us think of all the problems we've had courtesy of an incompetent body builder. So it definitely had to be changed.
Decor Planning
The first thing to do was to develop the plan for the entire decor remodel. This was done after looking at scores of interiors inside high end RVs and especially, Euro built expedition trucks.
Most of the work was done in Photoshop so we could bring in photos of appliances and other bits and bobs. Here's what we came up with.
Ceiling Plans


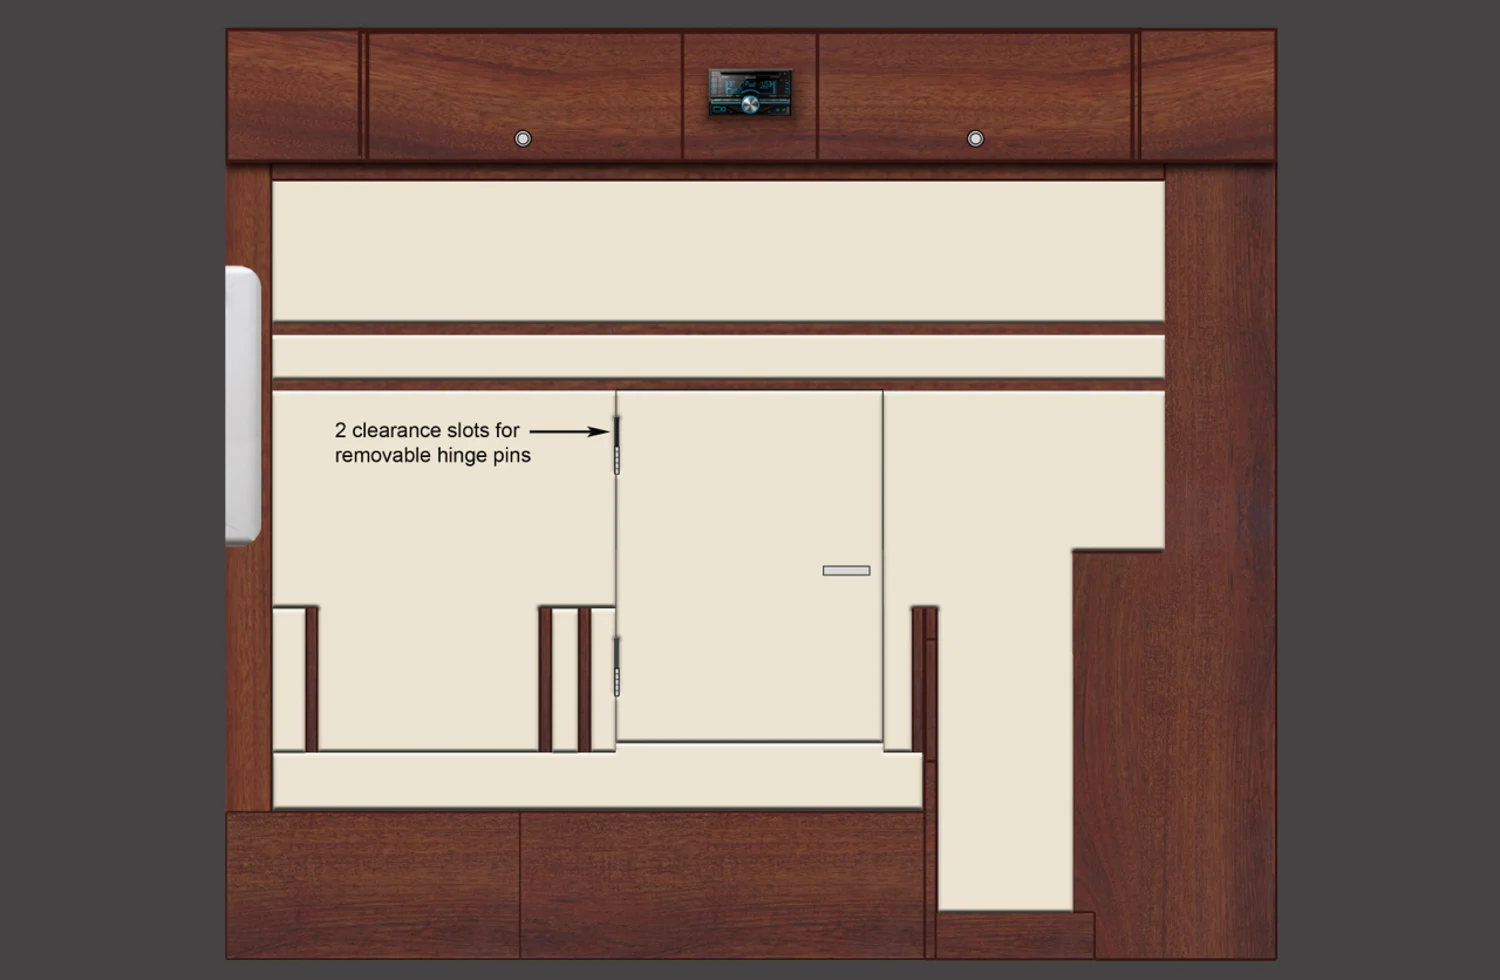
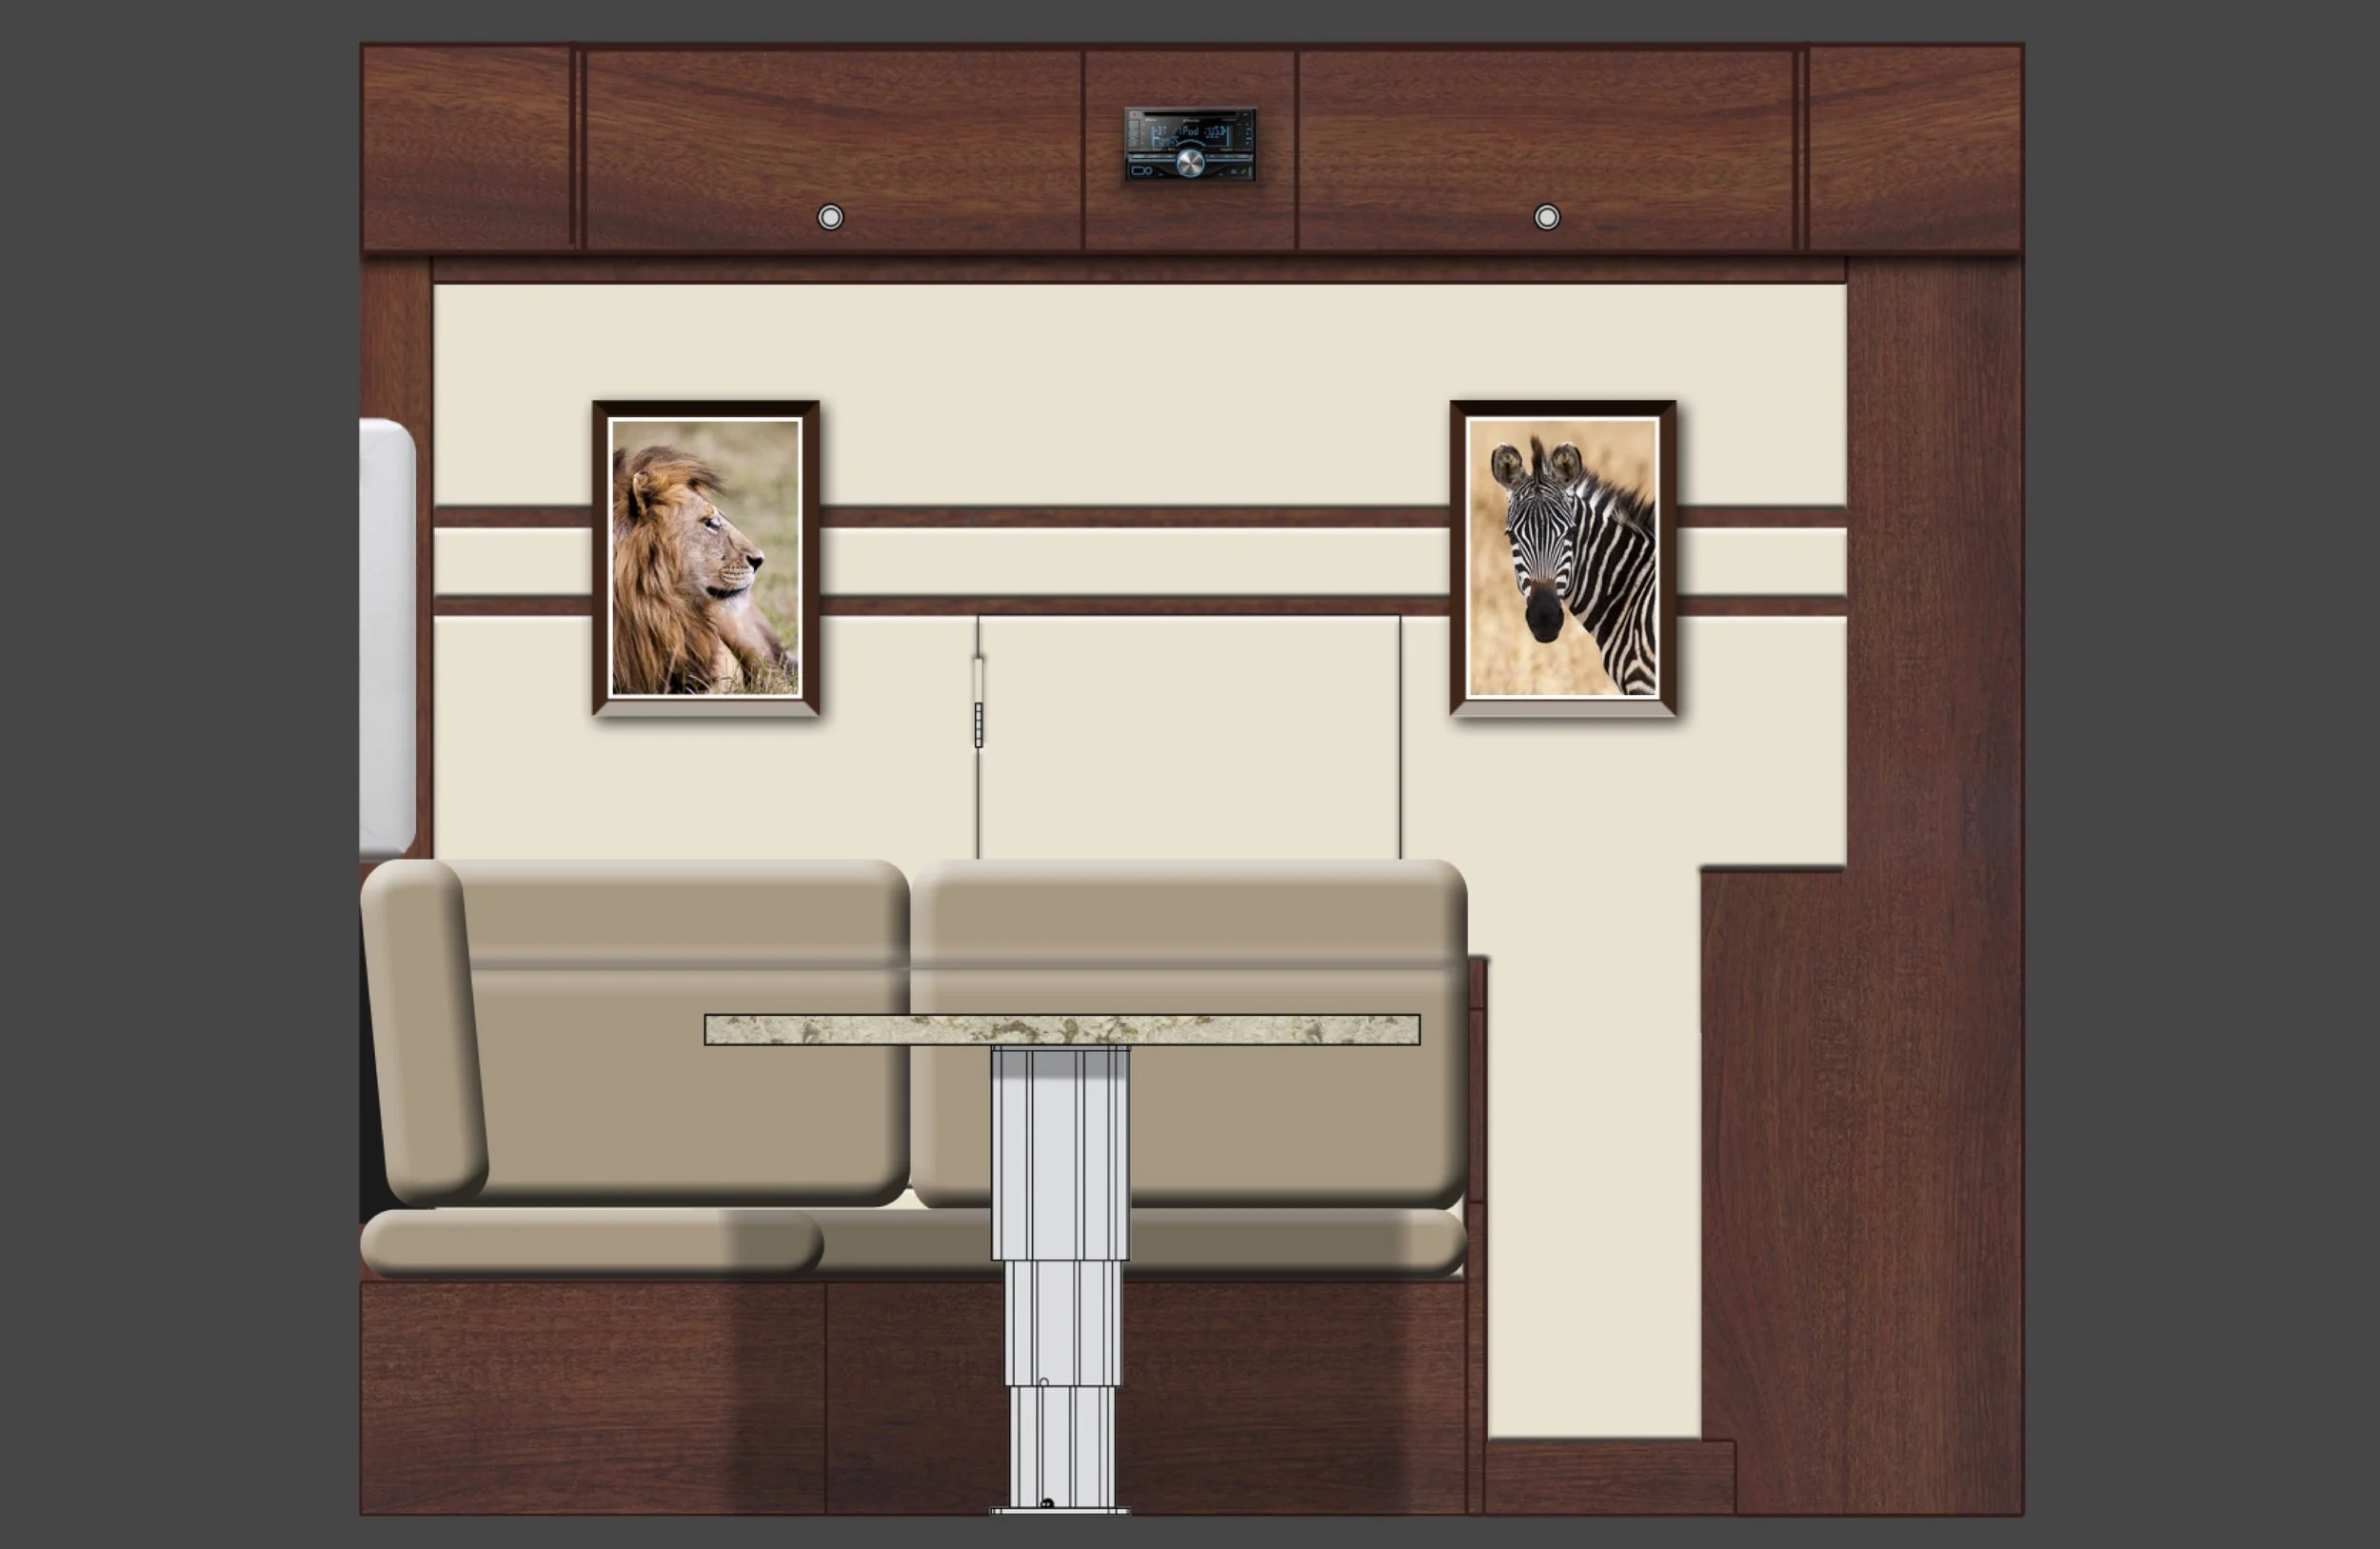
Wall Plans


Lighting Adjustments
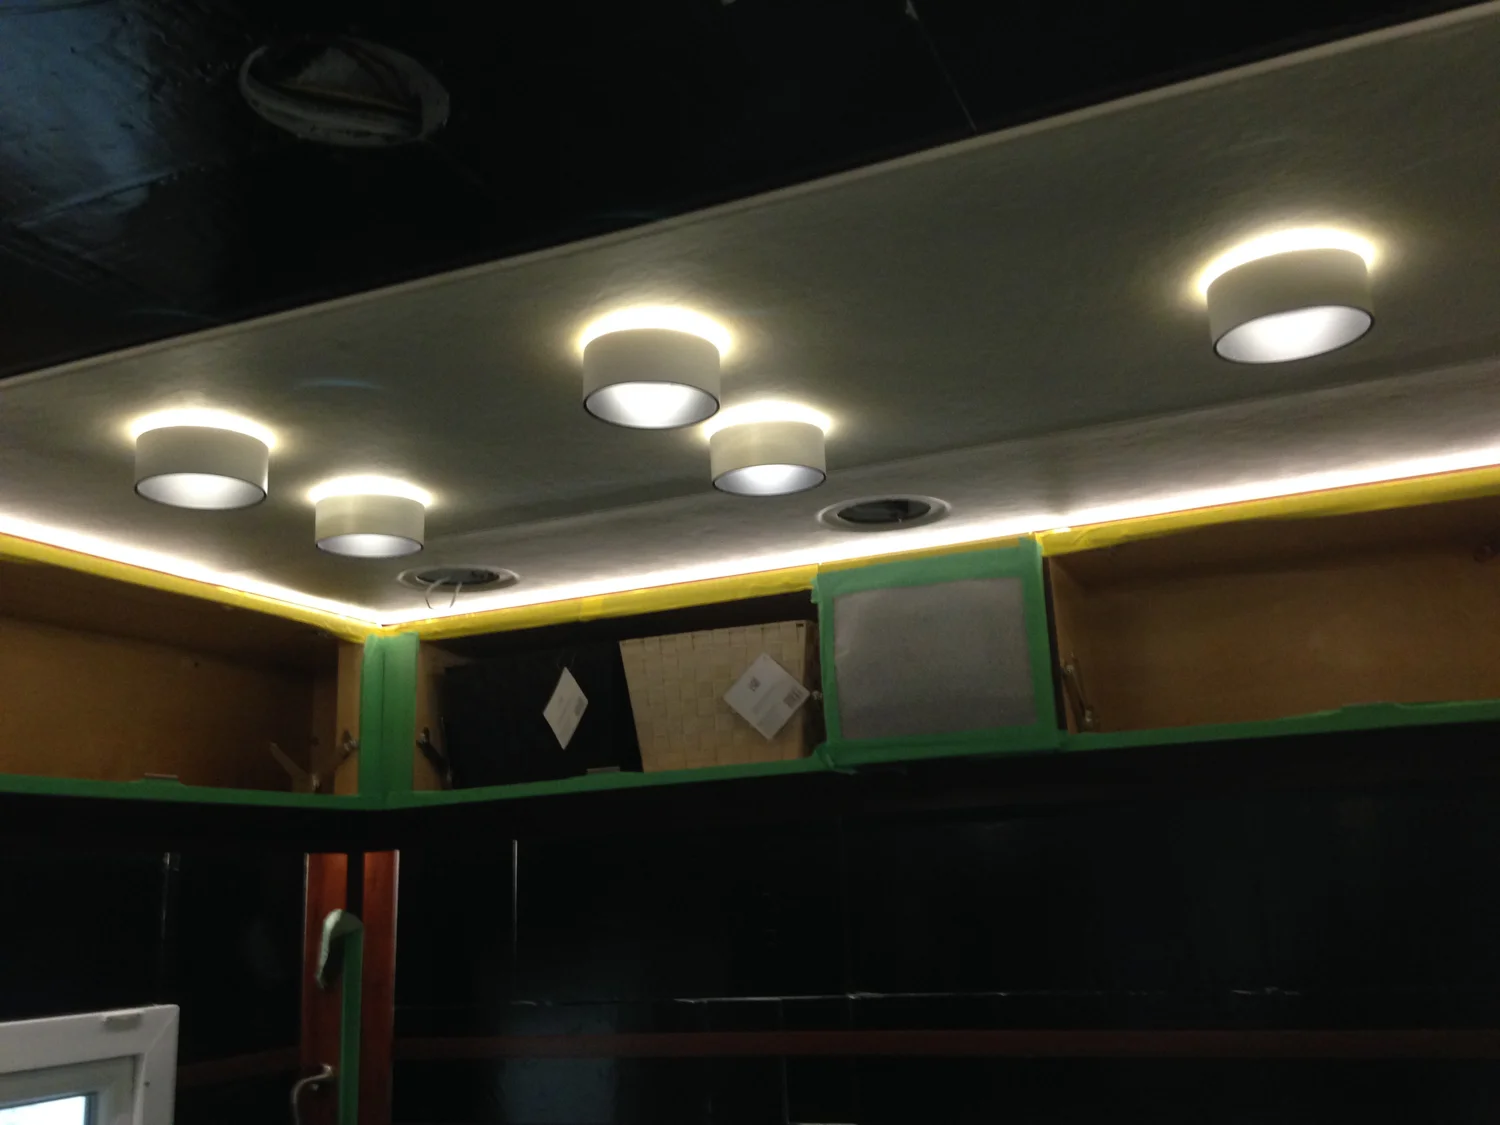
When the ceiling lights were installed, the shop workers must have done it according to their "shop procedures", because there appeared to be very little thought put into where the lights were positioned. Simple things like centering them above the dinette table, and having one side of the cabin line up with the opposite, seems to have been ignored. Apparently they haven't heard of the process of creating a "reflected ceiling plan", and then using it to install the lighting.
So the first thing for us to do was move the lights to reflect a properly thought out location plan. Sometimes this would mean moving them a foot, and others less than a few inches. We also added two more lights over the dinette table to centre the group over the table.
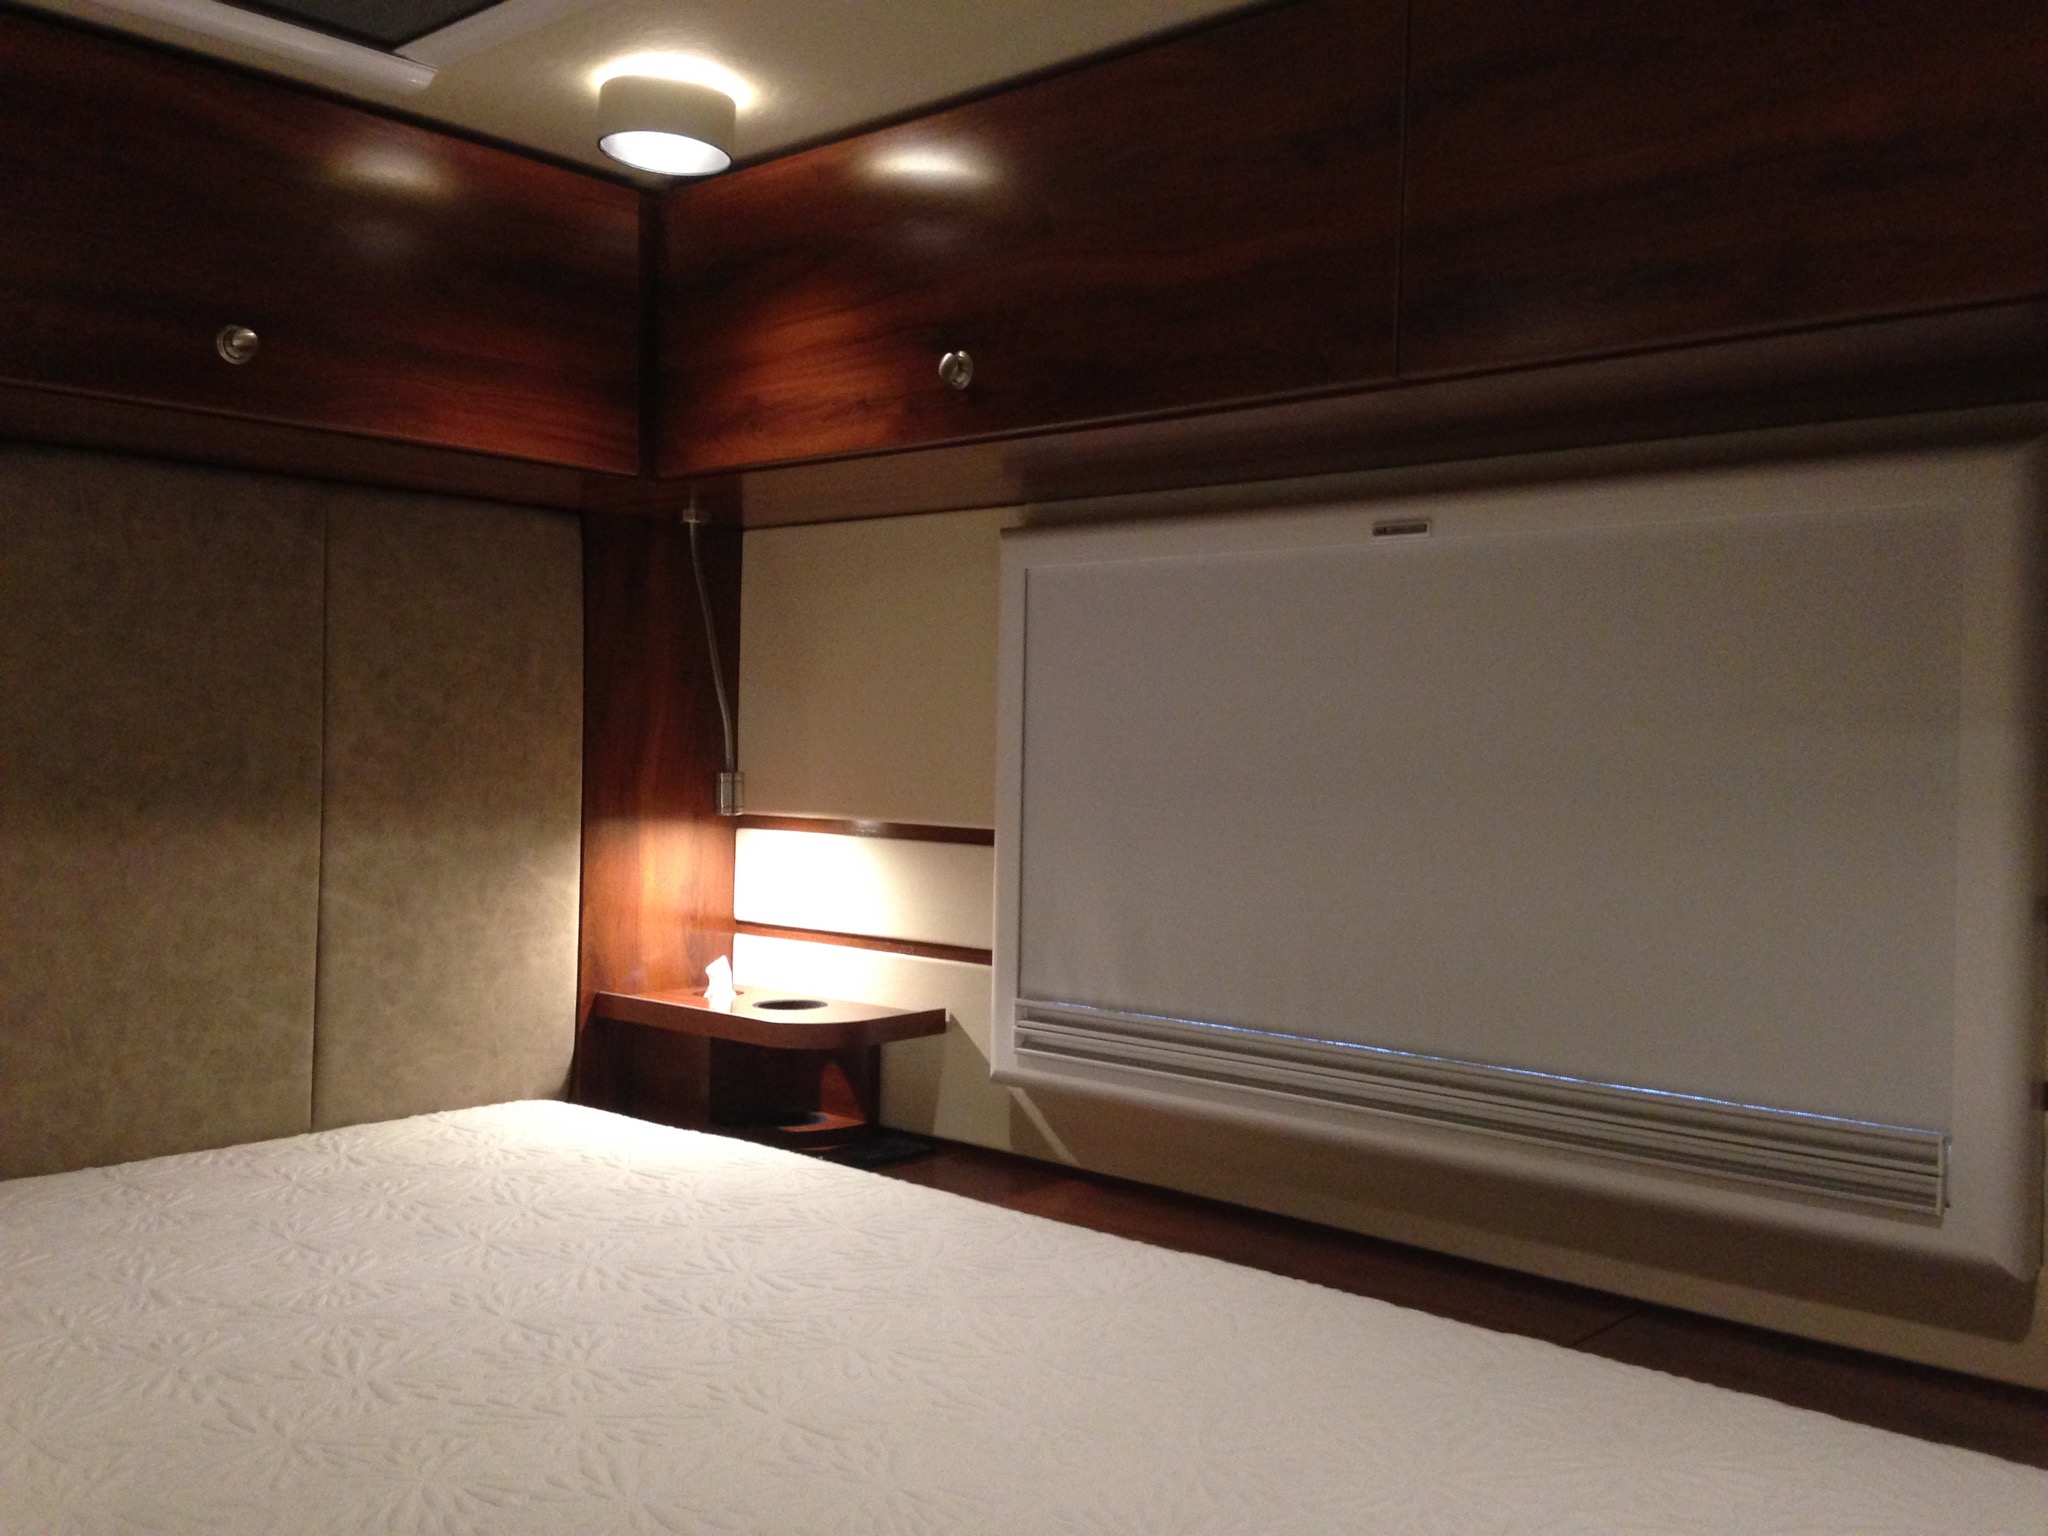
To assist with the warmth and feel of the area, we also added indirect strip lighting above all the cabinets. This was done by installing side shot LED ribbon lighting on a dimmer circuit. It was this perimeter strip lighting that changed the entire mood of the cabin interior.


Valence Installation
In order to add the extra strip lighting we wanted to improve the mood inside the cabin, we also had to add valences underneath all the ceiling cabinets, and in the coffee cabinet as well. To do this we had to buy some of the Windsor Mahogany laminate to cover the baltic birch plywood that would make up the valences. Once made, the valences were held in place with downward pointing screws from inside the cabinets.


Wall & Ceiling Sound Deadening
Composite wall panels may be great for thermal insulation, but when it comes to sound infiltration, they really suck. And if you are a light sleeper like I am, that's a problem. Even the rain hitting the roof sounded like it was amplified. So we had to tackle this before applying any decorative treatment.
The best thing we've found for sound deadening, that isn't bulky, is a competitive product to the well known Dynamat material. Hush-Mat is identical to Dynamat in every way, but is much less expensive. We used it to cover the surface of the interior walls and ceiling. The material can be purchased in a bulk box of thirty 12" x 24" self adhesive sheets. Simply peal and stick. The only tricky part is applying it so air bubbles aren't trapped under the sheet. It goes pretty quick when doing large flat surfaces, but slows down considerably when cutting around cabinets, windows and other fixtures.


Wall Accent Stripe Installation
Once all the Hush-Mat was installed, the next task was to figure out where we wanted the accent stripes. And what determined this was the location of the top jamb of the tunnel door. We didn't want to try and line up stripes if they went across the door. Originally we were going to have three stripes. But after looking at a mockup, and discovering the door complexity, we decided to go with two stripes. It was definitely the right decision.
We wanted the stripes to match the woodgrain finish on the interior cabinets. So we bought a roll of laminate edging, and adhered it to the Hush-Mat using 3M double sided tape. We had three different thicknesses of tape to adjust for different thicknesses of metal edge material on the tunnel door and elsewhere.
We started on the front wall, and then continued the stripes all the way throughout the truck until we hit the headboard for the bed. The bathroom also had an accent stripe, but we decided on an individual one because it worked better with the cabinets and counter top.


Wall and Ceiling Panels
It was at this point that we had to get some help to finish the interior work. The wall panels we wanted to install required a large area to spread out the fabric and backing boards when working on them. The work also had to be done in a climate controlled environment, and required the use of toxic contact glue which we weren't willing to expose ourselves to.
To accomplish this, we solicited the help of a restoration and hot rod shop that came highly recommended for doing the interiors of cars, yachts and even private jets.
We spent the first couple of weeks looking at fabric samples to find one that suited our colour palette. The fabric spectrum ranged from $40 per yard all the way up to $150 per yard for Ultra Leather. Fortunately we found the perfect material in a marine upholstery fabric for only $45 per yard. The bonus was that it is mildew resistant and UV stable. So it won't fade over time.
It took a couple of months for them to finally get it all done, as they had to fit it in amongst all of the other projects they were working on. But the wait was worth the result.


So, was it all worth it? Well, what do you think?


