New Storage - Black Tank To Tool Locker
Conversion Of Our Old Black Tank Area
This is our area of focus. The black tank locker, seen here with the upper closure panel removed.
A number of projects ago when we converted our water guzzling toilet to a composting toilet (best thing we’ve done to date, and can be seen here), we left the old black tank in place so as to provide a grey water “overflow” tank in situations where we couldn’t immediately empty the grey tank. Like when boondocking in a location for more than a few days. But in the nearly two years since we did the toilet conversion, we have never used it. So to make better use of that, the largest outside locker we have, we made the executive decision to convert it into a maintenance locker. Here is where we’ll house all the tools and parts bins for the truck.
First Step - Tank Removal
We decided to keep the functionality of the black tank plumbing, for liquids only, and with a smaller, removable tank.
Removing the old black tank took a bit of effort as it was keyed into the compartment with inflow drainpipes and a level sensor electrical connection. The compartment also had a hydronic heating radiator plumbed in under the tank to prevent freezing in winter. So all these connections needed to be removed. We didn’t need the heating system anymore since this compartment would no longer house any freezable liquids. The new, smaller holding tank for the toilet liquids would so seldom be used that it would not be an issue in winter, as we’d just keep it empty. It will also serve as a grey tank transfer vessel if we need to empty grey tank fluid, but don’t want to move the truck when not in a full service parking spot like an RV park. We’d just sit the jerrycan under the grey tank outflow and open the valve. Interestingly, the black jerrycan that will provide these functions will slide right into the pannier bags on the side of the motorcycle. So we could carry two of them on the bike to a dump station if it was too far to walk. But after seven years of experience traveling with the truck, I doubt we’ll need to worry about that much.
Helping The Heating System
The big advantage of removing the compartment heating is that it will take a 20 foot loop of hose out of our hydronic heating system which will reduce its complexity, and make it run much more efficiently. Especially when traveling in winter when heat from the boiler would no longer be lost to that circuit, but instead be totally focused on heating the habitat. Running more efficiently means burning less diesel, so a good thing for the environment as well.
Black Tank Alternative - Sceptre Military Products
A viable alternative to the black tank in this case was the use of a high quality plastic jerrycan. This Canadian made, NATO approved container was our perfect solution.
https://scepter.com/products/military-products/
Maximizing Locker Utilization
The left hand side of the compartment was reserved for the new liquids jerrycan.
With the locker now cleared out, the process of determining how best to configure it began. The first constraining factor was our decision to retain the black tank plumbing, and therefore an area under it to house the new, removable toilet liquids 20 litre jerrycan. This heavy duty plastic jerrycan is a NATO approved water container, made in Canada by Sceptre Industries. We’ve had a lot of experience with the Sceptre NATO products and are confident that their high quality will serve us well in this situation. We chose the black colour so there would be no way these water containers could be mistakenly interchanged with our four Sceptre sand coloured fresh water containers. With a Sceptre NATO product dealer right here in the city, it was easy to purchase them, along with a purpose designed mount to hold the container in place.
Power Tools And Gear Configuration
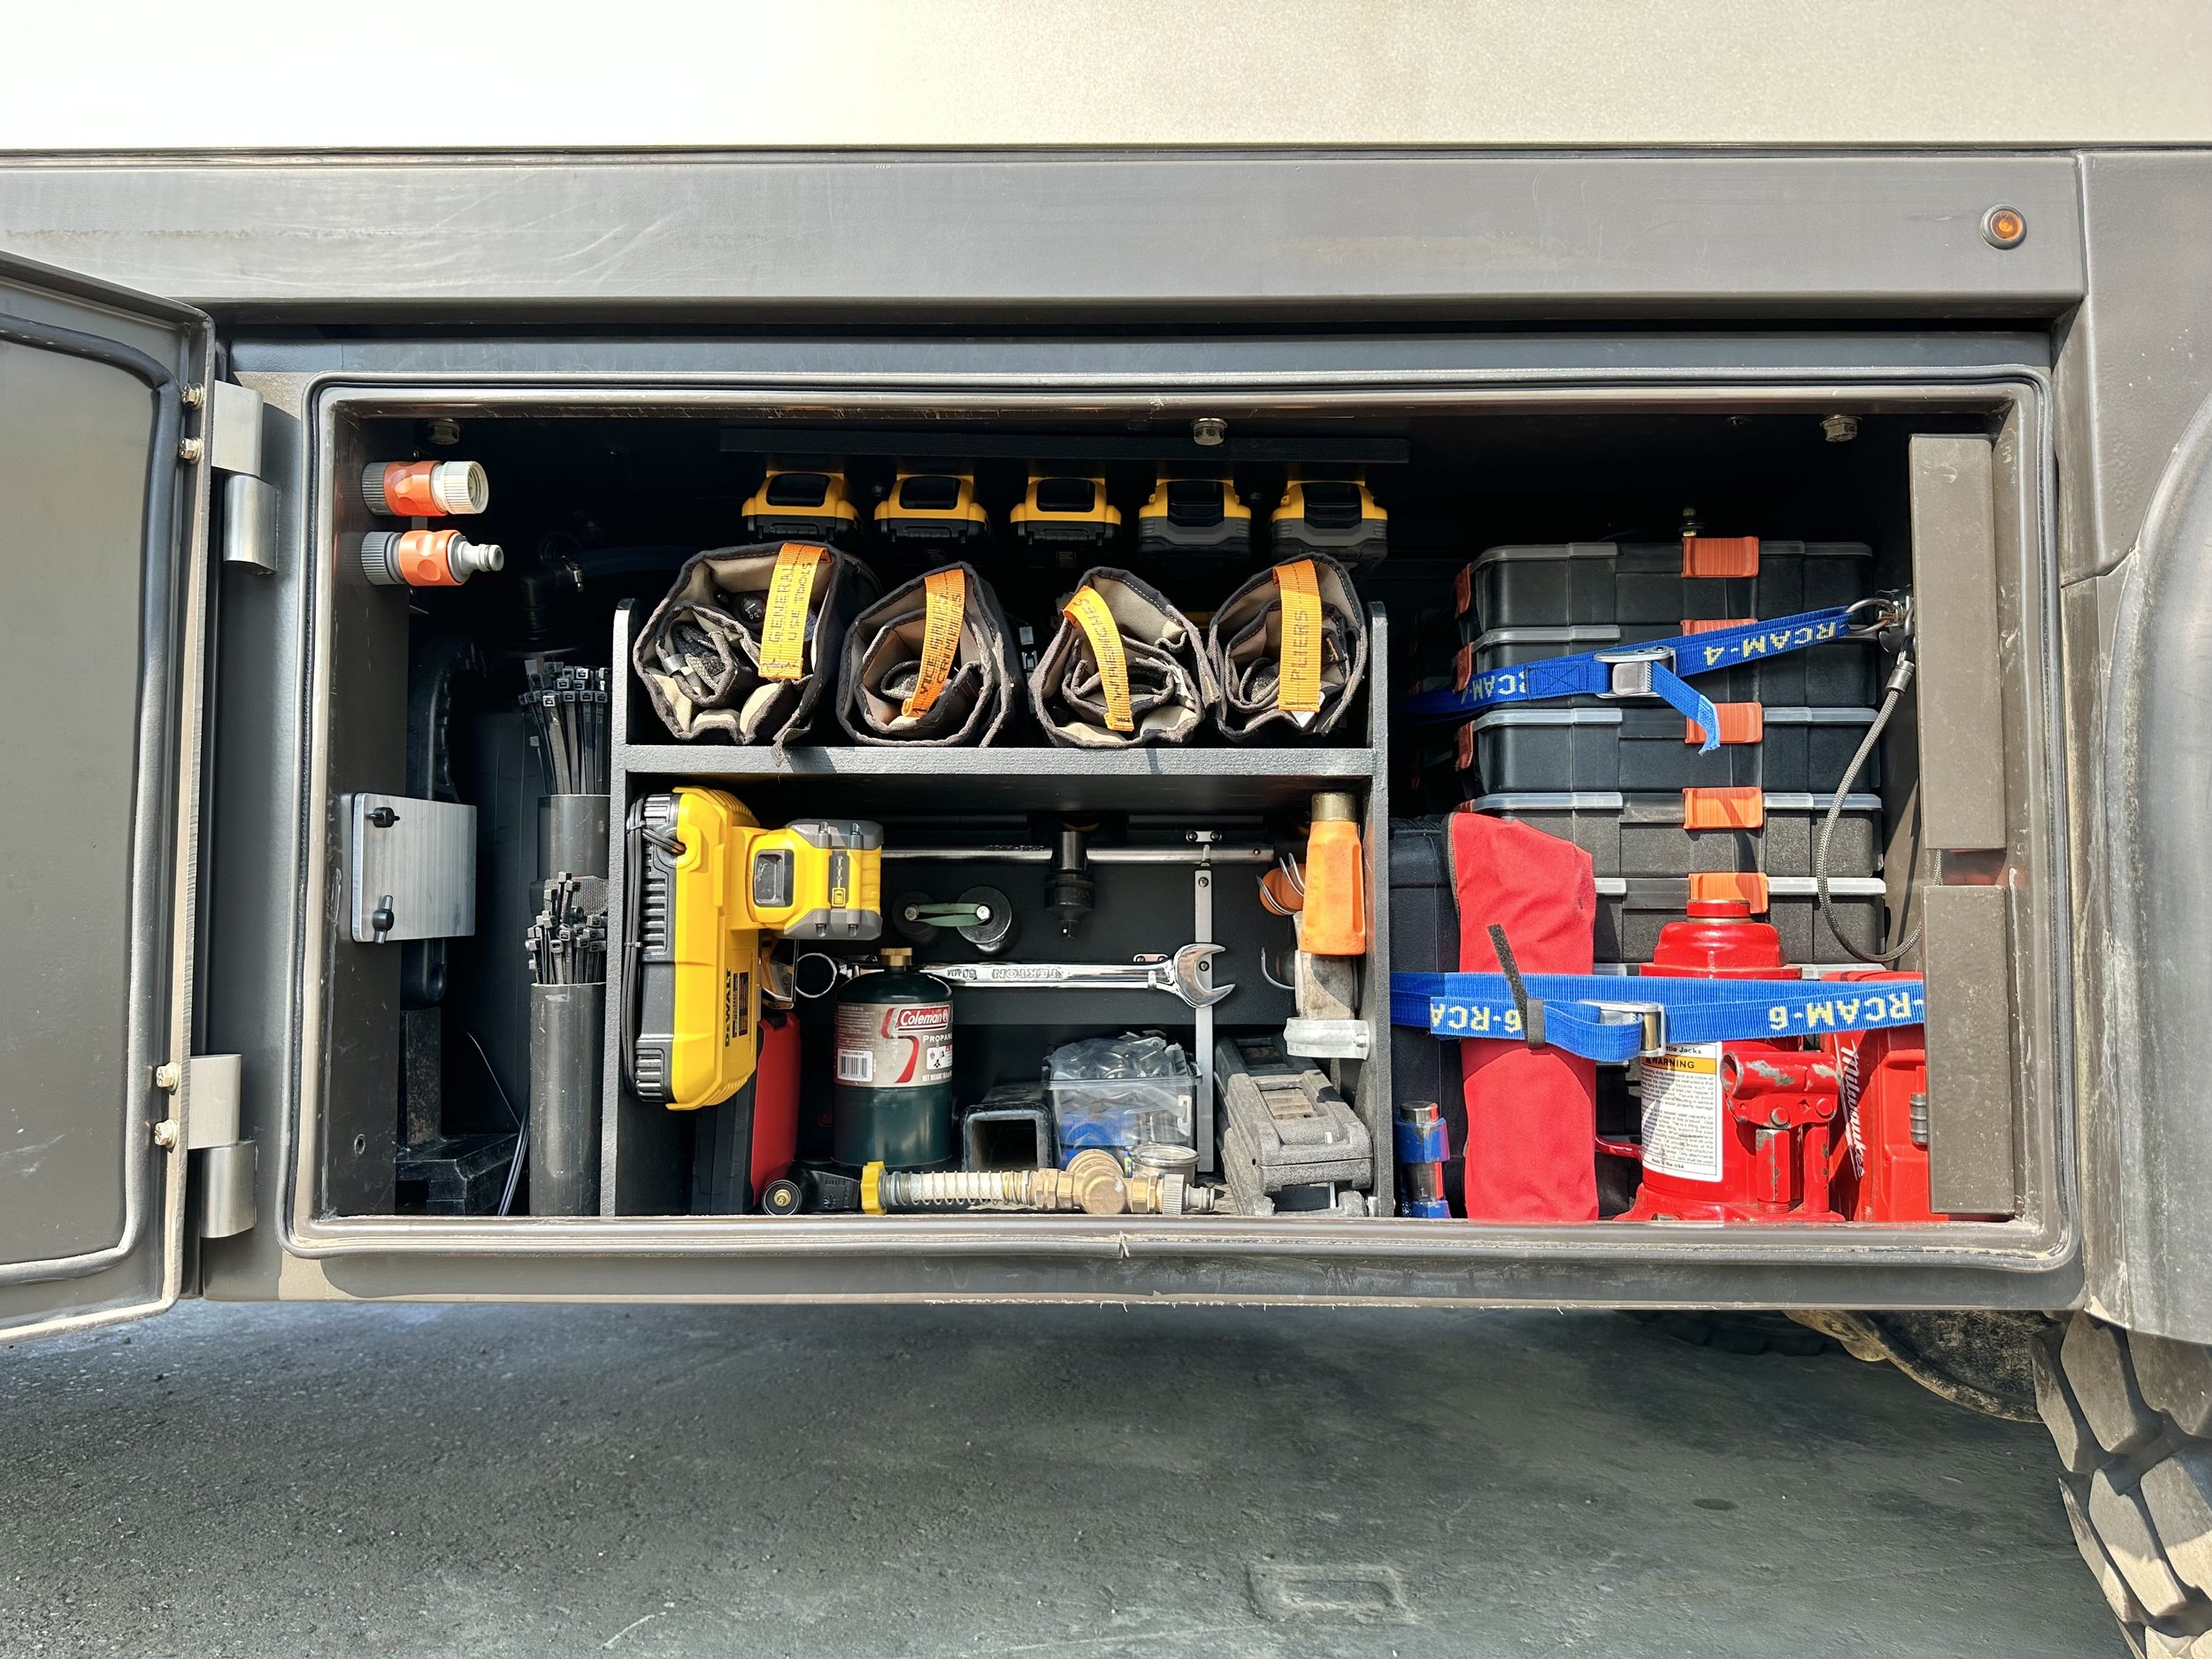
Specific organization makes for quick and easy equipment or parts access.
With the removable jerrycan mounted and plumbed in, it was time to move onto the tool and parts bin configuration. Removing all the pink insulation gave us another 14mm of space on three sides, but more importantly, it would allow us to mount logistic track and power tool mounts to the walls. This would prevent everything stored in this locker from being tossed around when traveling on rough roads. It would also ensure that things would be put back in a specific orientation so we can always quickly find what we need when it’s required.
Organizing the Hand Tools
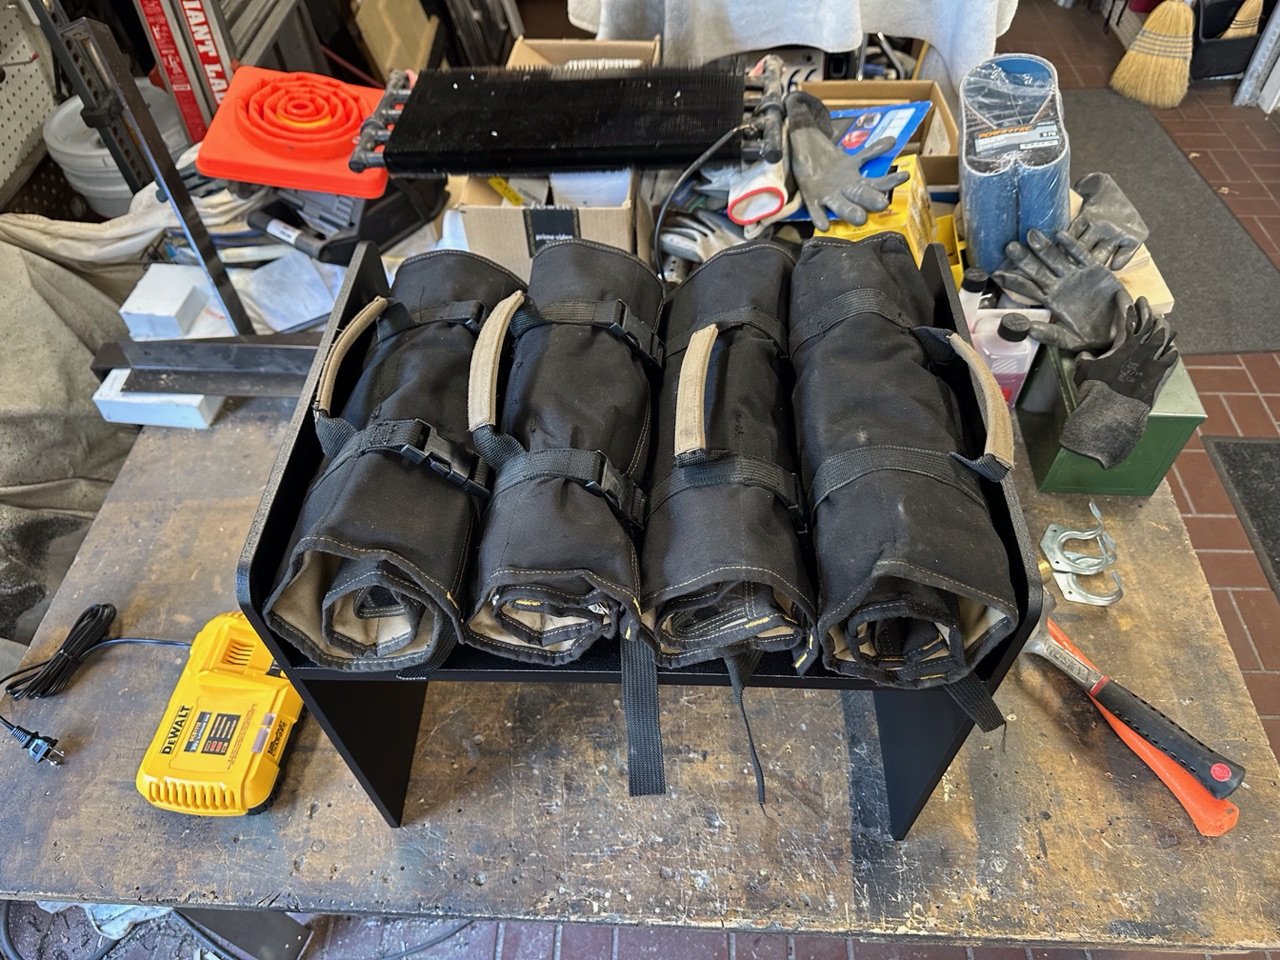
With the large-ish area in the locker centre begging for something to hold, the challenge was to create something that would hold the four tool rolls that we always had to cram into the small space inside the right side boiler compartment. But we don’t just want to pile them on the floor. A more creative solution was called for.
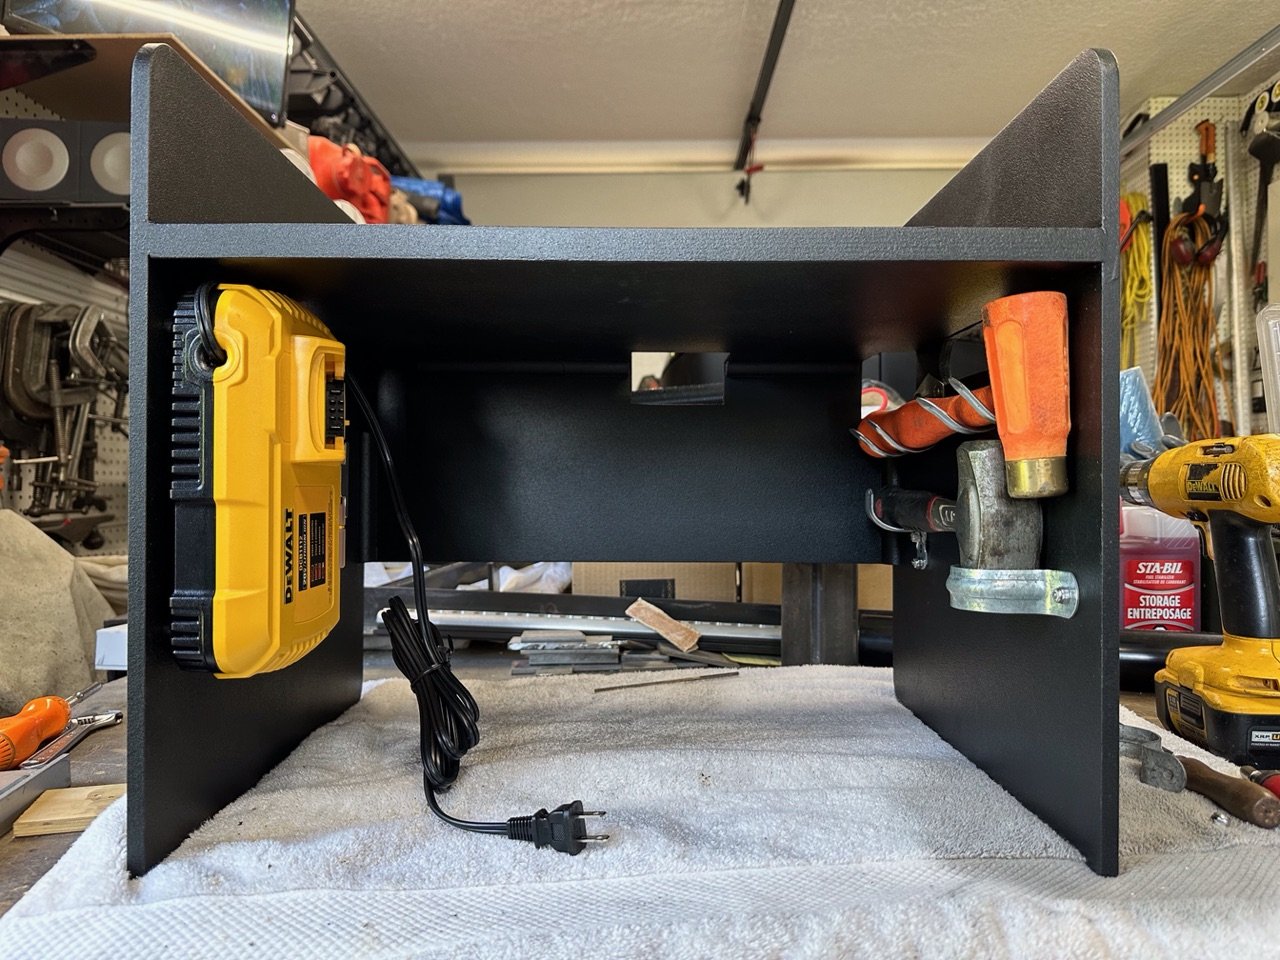
We also had other items to organize. Since we now were carrying cordless power tools, we needed to store the batteries, as well as find a place for the battery charger. A small steel “sledge” hammer and urethane mallet needed a home, as well as the grinding disks for the angle grinder. We also had a few specialty tools to store, like the 30mm combination wrench and socket that are used solely for the bolts that hold the two steering boxes in place, and a 1-1/2” socket that is used for the 1” pivot point bolts on the front and rear mount points for the habitat subframe.
Mounting things on the ceiling makes for maximum compartment utilization.
A logical place for the batteries was the ceiling of the compartment, since we had purchased battery storage mounts when we bought the new power tools. They were simply screwed to a small piece of plywood that was then screwed to the ceiling.
The best solution we could think of for the tool rolls was a tool caddy that elevated things off the locker floor. We could make it the right width so all four rolls will sit side by side, with enough room to lift them vertically a few inches to easily remove them from the caddy. In the old location we had to try and cram them in by sliding them endwise on top of each other. The result of doing this enough times was a broken Fastex buckle on one roll which I had to fix with a new buckle and the sewing machine.
Tool Roll Contents
Since there might be some of you that wonder what we carry in four tool rolls, below is the contents of the various rolls. It would be more efficient space-wise to just throw everything in a small, one compartment tool box, but this way we know exactly what is in each roll, and we can grab the roll and take it to the area on the truck where we need to use them. Each roll is labeled so we know which one to grab.
Tool Caddy & Electrical Power
We had some bits of Baltic birch plywood left over from previous projects, so we were able to make the shelf out of 3/4” plywood and the rest was done with 1/2”. Notches were cut to fit in around the power tools stored on the back wall, and done in such a way that those power tools could be removed without having to remove the tool caddy. We just have to lift out the tool rolls to access the power tools. The only reason we need to remove the tool caddy is if we need to remove the black jerrycan, and that will be very infrequent. The tool caddy was painted with our usual bed liner spray. It’s an easy way to finish things, and it’s pretty durable.
Job Done
With the tool caddy finished, and the electrical service installed and tested, the conversion of the old black tank locker to the new tool locker is now complete. Adding to the satisfaction of this conversion was the completion of the door hinge repair. Now not only do we have a snazzy new tool locker, but we have one with a door that opens and closes easily, and indeed holds out dust and moisture too.


