Tech Cabinet Tiny Drawers
A better solution
After six years of using the truck, and finding and re-doing the problems and annoyances we have discovered so far, we have yet another improvement to make.
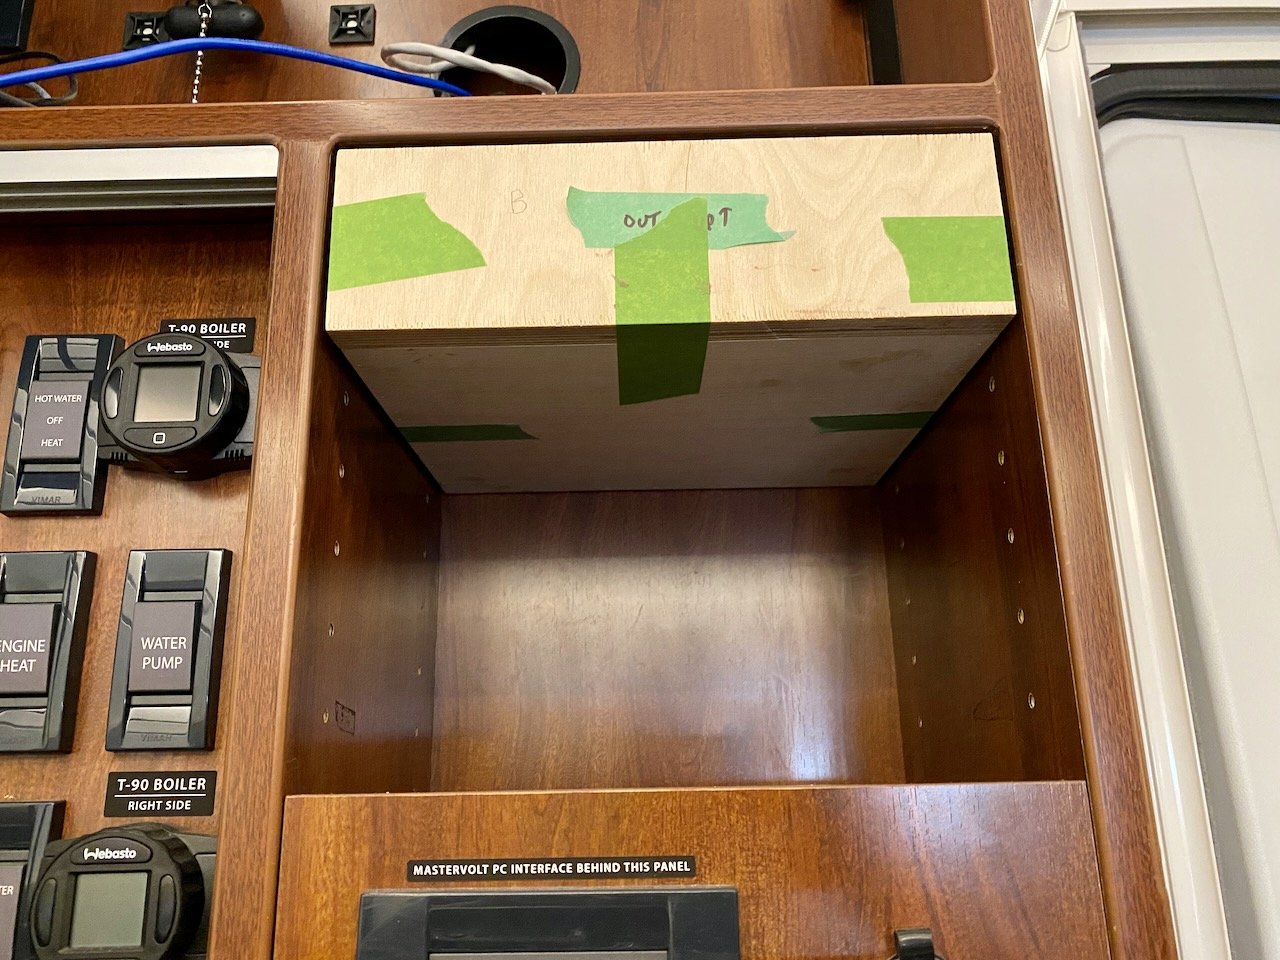
The original cabinet shelves with the Mac Mini and other assorted junk shoved into them.
When first built, I designed the tech cabinet at the front of the habitat to house not only the control panel, TV and all the camera gear, but also the Apple Mac Mini computer and its accessories. The Mini was connected to a 3 terabyte hard drive which stored our iTunes library and ran the Apple TV for when we were off grid and wanted to watch a movie or such. With the improvement in technology, and the change in the way we use it, we have found that the simple shelves we designed into the cabinet were no longer necessary, or indeed the best use of that space.
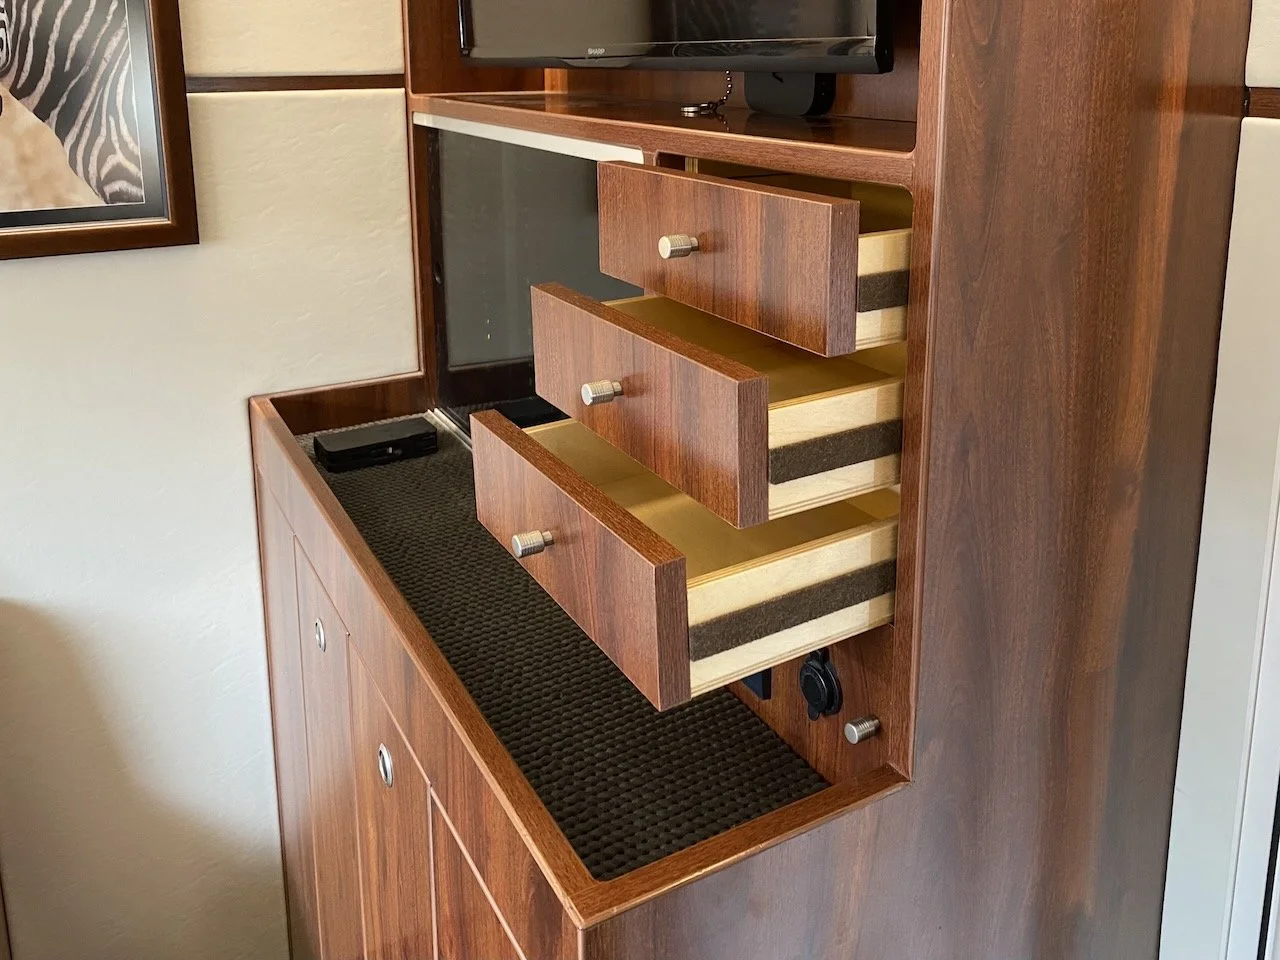
Since the Mac Mini has now been replaced with the much more powerful MacBook Pro M1 with 8 terabytes of internal storage, and doesn’t need a permanent location from which to operate, it was decided to change the three shelves into three small drawers. These would be much better at storing the small odds and sods that one tends to collect and use on a regular, but not so frequent basis.
Beginning The Process
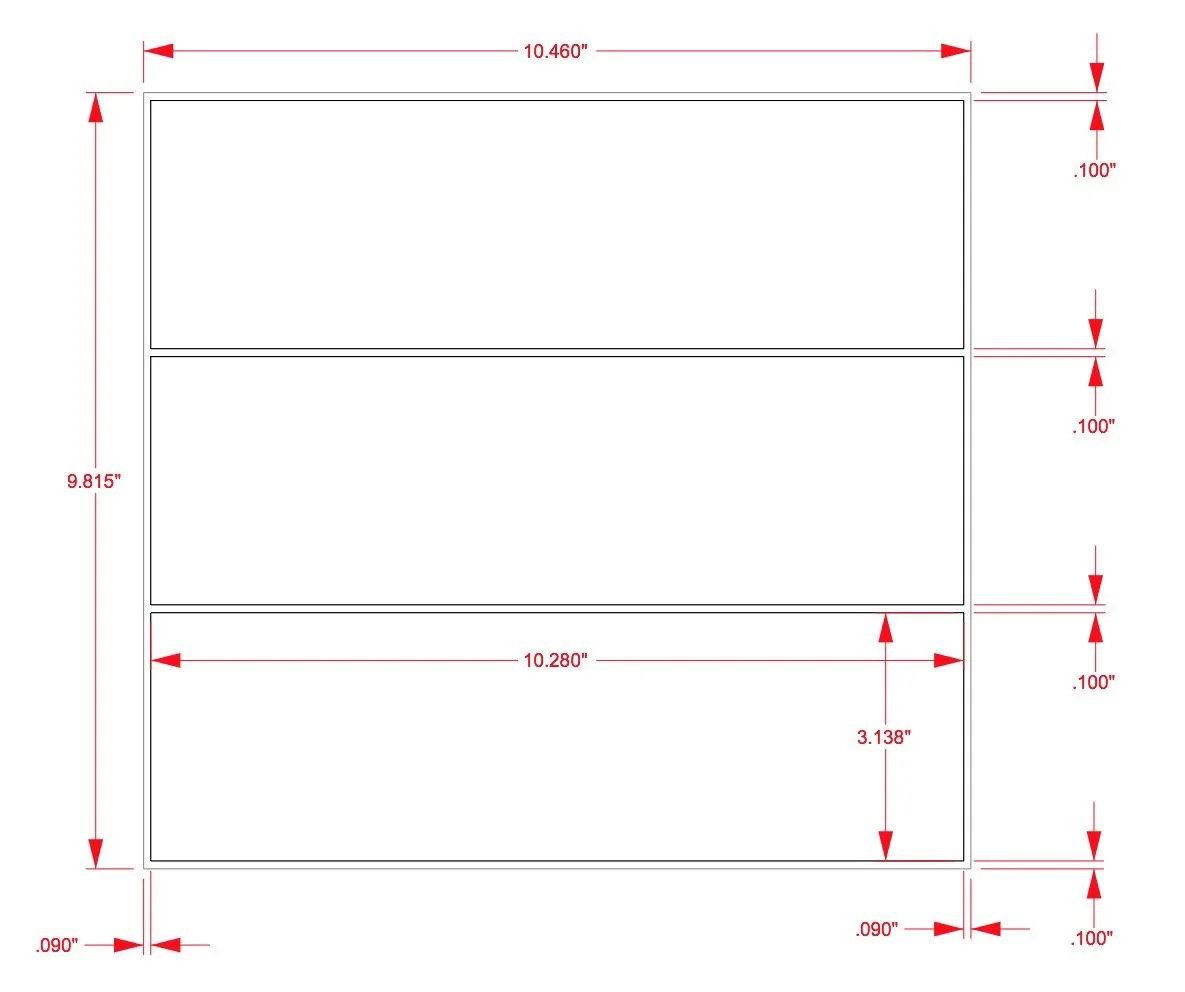
The first step was to use a vernier caliper to determine accurate dimensions of the space we wanted to fill with drawers, and then calculate the drawer sizes allowing for an even gap all around the perimeter of each drawer. Time well spent on the computer with the drawing program.
Construction Begins
Cut to within a few thousands of an inch of our target dimension. Not too shabby.
Made from 1/4”, 3/8” and 3/4” baltic birch plywood, the parts were cut on the table saw with some effort being put into getting the dimensions spot on. Not an easy task considering the crudity of my well used (and abused) portable contractor table saw. But with perseverance, and the vernier caliper, I made it happen.
Sanding the flat pieces before the glueing process begins.
Once cut, the parts were all sanded before the glueing process was started. This, because sanding flat pieces is so much easier than trying to sand into the corners of the assembled boxes.
After sanding, the parts were prepared for glueing by masking the areas adjacent to the glue joints so that no glue would get onto what would be the finished surfaces of the drawers. Although somewhat time consuming, it’s infinitely better than trying to scrape off the oozed out glue without contamination of the exposed wood surface.
The Finishing Process Has Several Steps
The varnish goes on glossy, but cures to a satin, non-reflective surface.
Step One – Varnishing
Once the glueing process was complete, and the pin holes from the brad nailer and other blemishes were filled and sanded smooth, varnishing the wood that wouldn’t be covered with laminate was next.
Since our favourite marine varnish was no longer available, we had to buy a similar product from a different manufacturer. It’s always a bit of a gamble when doing this, as there’s no way of knowing for sure if the new product will be as good. In this case, however, we got lucky and the product was very similar. It doesn’t flow out quite as well, and it retains its odour longer after it’s cured, but these are small issues.
Several coats of varnish would be needed, as the first coat essentially just seals the wood, but leaves a very rough texture because the liquid raises the grain of the wood. But when this first coat is dry and then sanded, and the surface leveled out, the second coat goes on smooth and remains that way. The product instructions call for 3 to 5 coats, but for something as simple and well protected from the elements as these little drawers, it was decided that two coats were quite sufficient.
Step Two – Laminate Surfacing
The piece of laminate cut from a larger sheet, ready for application as drawer fronts.
With varnishing complete the next step is to apply the Wilsonart Windsor Mahogany laminate to finish the front faces of the drawers so they match the cabinet. Without the specialized laminating equipment found in a commercial cabinetry business, the process was time consuming. First, the blank of laminate was cut off the full sheet that we had bought for the upcoming projects. Since we only needed a square foot of material, the easiest manner of cutting it off the 4’x8’ sheet was by way of a small angle grinder and a Zip disk. It cuts quickly and smoothly with no chipping of the laminate that can come from a toothed blade, and the sheet that is rolled up into cylinder didn’t even have to be unrolled. We started with a single blank, and laid out the drawer front sizes on them, and labeled them so the vertical woodgrain image would be consistent from top drawer to bottom drawer.
Masking tape applied to protect the varnished area from the contact cement.
With the laminate on the front face, the edging had to be applied. We have two types, a thick edging that’s about 1/8” thick and can be routed off flush with a standard edge router, and a thin edging (.020” thick) that’s cut off with a slitter or in our case, a knife. The advantage of the thin edging is that it will lie flat, where the thick stuff has a real curve to it that really needs a long run or heated glue to keep it flat and adhered to the wood. Since our runs are very short, the contact cement we use wouldn’t hold the thick edging on securely.
Preparing for Installation
Wood runners instead of metal glides.
With all the laminate and edging applied, the last thing before installation into the tech cabinet is to install the pull knobs and friction guides. Since these drawers are too small for commercially made drawer glides, we have to make our own the way cabinet makers of old did. Well… my version of how the old craftsmen did it at least.
Wood runners were used instead of metal glides, and to make the action smooth but snug, standard self adhesive furniture felt was used to provide the friction. As it happened, the felt product we found at the store was the perfect thickness to provide the right friction.
Final installation
Installation into the cabinet could have been problematic. I built the drawers assuming the cabinet opening would be square. Unfortunately, the cabinet makers in Missouri haven’t heard of the highly technical tool called a “square”. The small opening was out of square by 1/8” over a 12” run. In the cabinet making world, that’s a really big error. Fortunately for us, the height of our drawer fronts are only 3” each. So the parallelogram effect of the out of square opening is barely noticeable over the height of each drawer.
However, to ensure that all the horizontal gaps between the drawers and cabinet are parallel and even, the lower existing panel had to be rotated to the point where the diagonally opposed corners touched the surrounding opening. But the gap here was very small, and at the bottom. So not very noticeable. Once that was done we could use shims to space the drawer gaps, and then use a square to position the drawer runners.
Before and after images
Which one do you think looks better?


