
Truck Cab Solid Mounts
REPLACING BOUNCE With A SOLID Foundation
When we took delivery of the Volvo chassis it came with a standard cab configuration typical of many heavy trucks. Meaning that it was fitted with an air sprung driver’s cab. These heavy trucks have a tendency toward stiff front axle springs, and this provides for an uncomfortable ride. So to try and alleviate the discomfort, air sprung seats are supplied and air springs are installed on the back mounts of the cab to cushion the ride. The combination of these two would hopefully reduce the physical abuse the drivers would experience. But it’s a dumb solution, meaning that it is not sophisticated or intelligent in its operation.
This is one of two air springs that supports the truck cab at the back. The height is controlled by a switch that allows air from the engine’s air compressor to inflate it when it gets low.
With our truck, we found that these air springs conflicted with the proper operation of our Bose seats, which are computerized and don’t rely simply on air suspension to operate. They monitor the movement of the truck cab floor to which they are attached, and use a linear actuator to move the seat in an appropriate direction to counteract the movement of the cab. Unfortunately, the cab air springs exaggerated the cab movement to such a degree that the Bose seats couldn’t work properly. We had many a time when they would bottom out, or top out as the cab was tossed into the air on an upward lift in the road, or we hit a big dip in the road or trail. What makes the situation worse is the design of the cab itself. It is hinged at the front, where it is tied into the truck frame. So when a bump is hit and the frame lifts, the front of the cab is held firm and the back is catapulted vertically with the help from the air springs. For an air suspended cab to function properly it would have to be sprung equally front and back so as to mitigate this catapult geometry. But that kind of a suspension would be complicated to engineer, and therefore expensive to produce. Not something deemed necessary for a mere truck driver I guess.
We tested our theory by creating some braces to support the cab at the back and render the air springs inert, and then used ratchet straps to tie the cab down hard on the braces so it couldn’t move up or down. We then took the truck on a trip, and discovered that the ride was much improved. So we now knew that we could replace the air springs with solid mounts and get a better ride, and some other fringe benefits as well.
If you look carefully you can see a gap with light showing along the entire habitat face on the right. This is the effect of the bellows compression when the cab sits down during air spring deflation.
One such benefit is that the gap between the cab and habitat would now remain constant. With the air springs in place, as the cab bounced up and down the front hinged geometry would cause the rear face of the cab to move closer to, and farther away from, the front face of the habitat. With the bellows seal between the two faces, it created a pressure change in the access tunnel, which would in turn pop the closure doors open. This would no longer happen, thanks to the solid mounts. The solid mounts would also eliminate the problem of the bellows squish and deformation. With the air springs in place, and the truck stored for a period of time, air would eventually bleed out of the system and the air springs would deflate, lowering the cab at the rear. When this happened it would reduce the gap between the cab and habitat, and the bellows seal would get compressed. Left like this over time, especially in cold weather, the bellows would not expand back out to fill the gap when the air springs lifted the cab back up to operating position. The result was an open slot all around the tunnel seal where water would get in. The solid mounts would eliminate this problem.
One of the two air springs we removed. The solid mounts would also allow us to install a roof rack over the cab if desired at some point.
The final side benefit of replacing the air springs would be the elimination of multiple points of eventual failure. With the air springs, they themselves could fail over time. But there’s also the valving and mechanism that keep the air springs inflated to the right height. They can eventually fail as well. We’ve already had to replace the valve for a cost of over $500, and that after only a couple of years.
“Off-the-shelf” solid mounts
We tried to see if we could buy solid mounts from Volvo, and save us the effort of making our own. But when talking with the parts department, they claimed they couldn’t help us. They had never seen solid mounts, and because of the way their system is designed, they couldn’t do a search for mount types for the various model trucks. All they could do is input the VIN number of our truck, and tell us what was installed on it when it was built. In order to find out if a solid mount was available, we’d have to find a truck that had solid mounts from the factory, get the VIN number of that truck and then give it to the parts minions so they could then look up the part number and order it. Really helpful. NOT!
Manufacturing Our Own Solution


Since it would probably take forever to find out if Volvo did indeed make a solid rear cab mount, we decided to design and make our own. Doing so was not particularly difficult. They’re essentially just a steel post after all. Besides, if Volvo did make a solid mount, we wouldn’t know if its height would be right for our application.
The nice thing about this project is that it’s small, and could be done using materials left over from other jobs done over the years. What we needed was some heavy square tubing, angle iron, some steel plate and some 3/8” thick rubber conveyor belting to be used for vibration dampening. All of which we had sitting about our little workshop. We even had the necessary bolts to finish the installation once the mounts were fabricated.
Step One: Part Removal
To get the old air springs out of their mounts we had to jack up the truck cab just enough so we could to deflate the air springs, remove the lower attachment star washer and then unscrew the air spring from the upper seat.


Step Two: Fabricating the parts
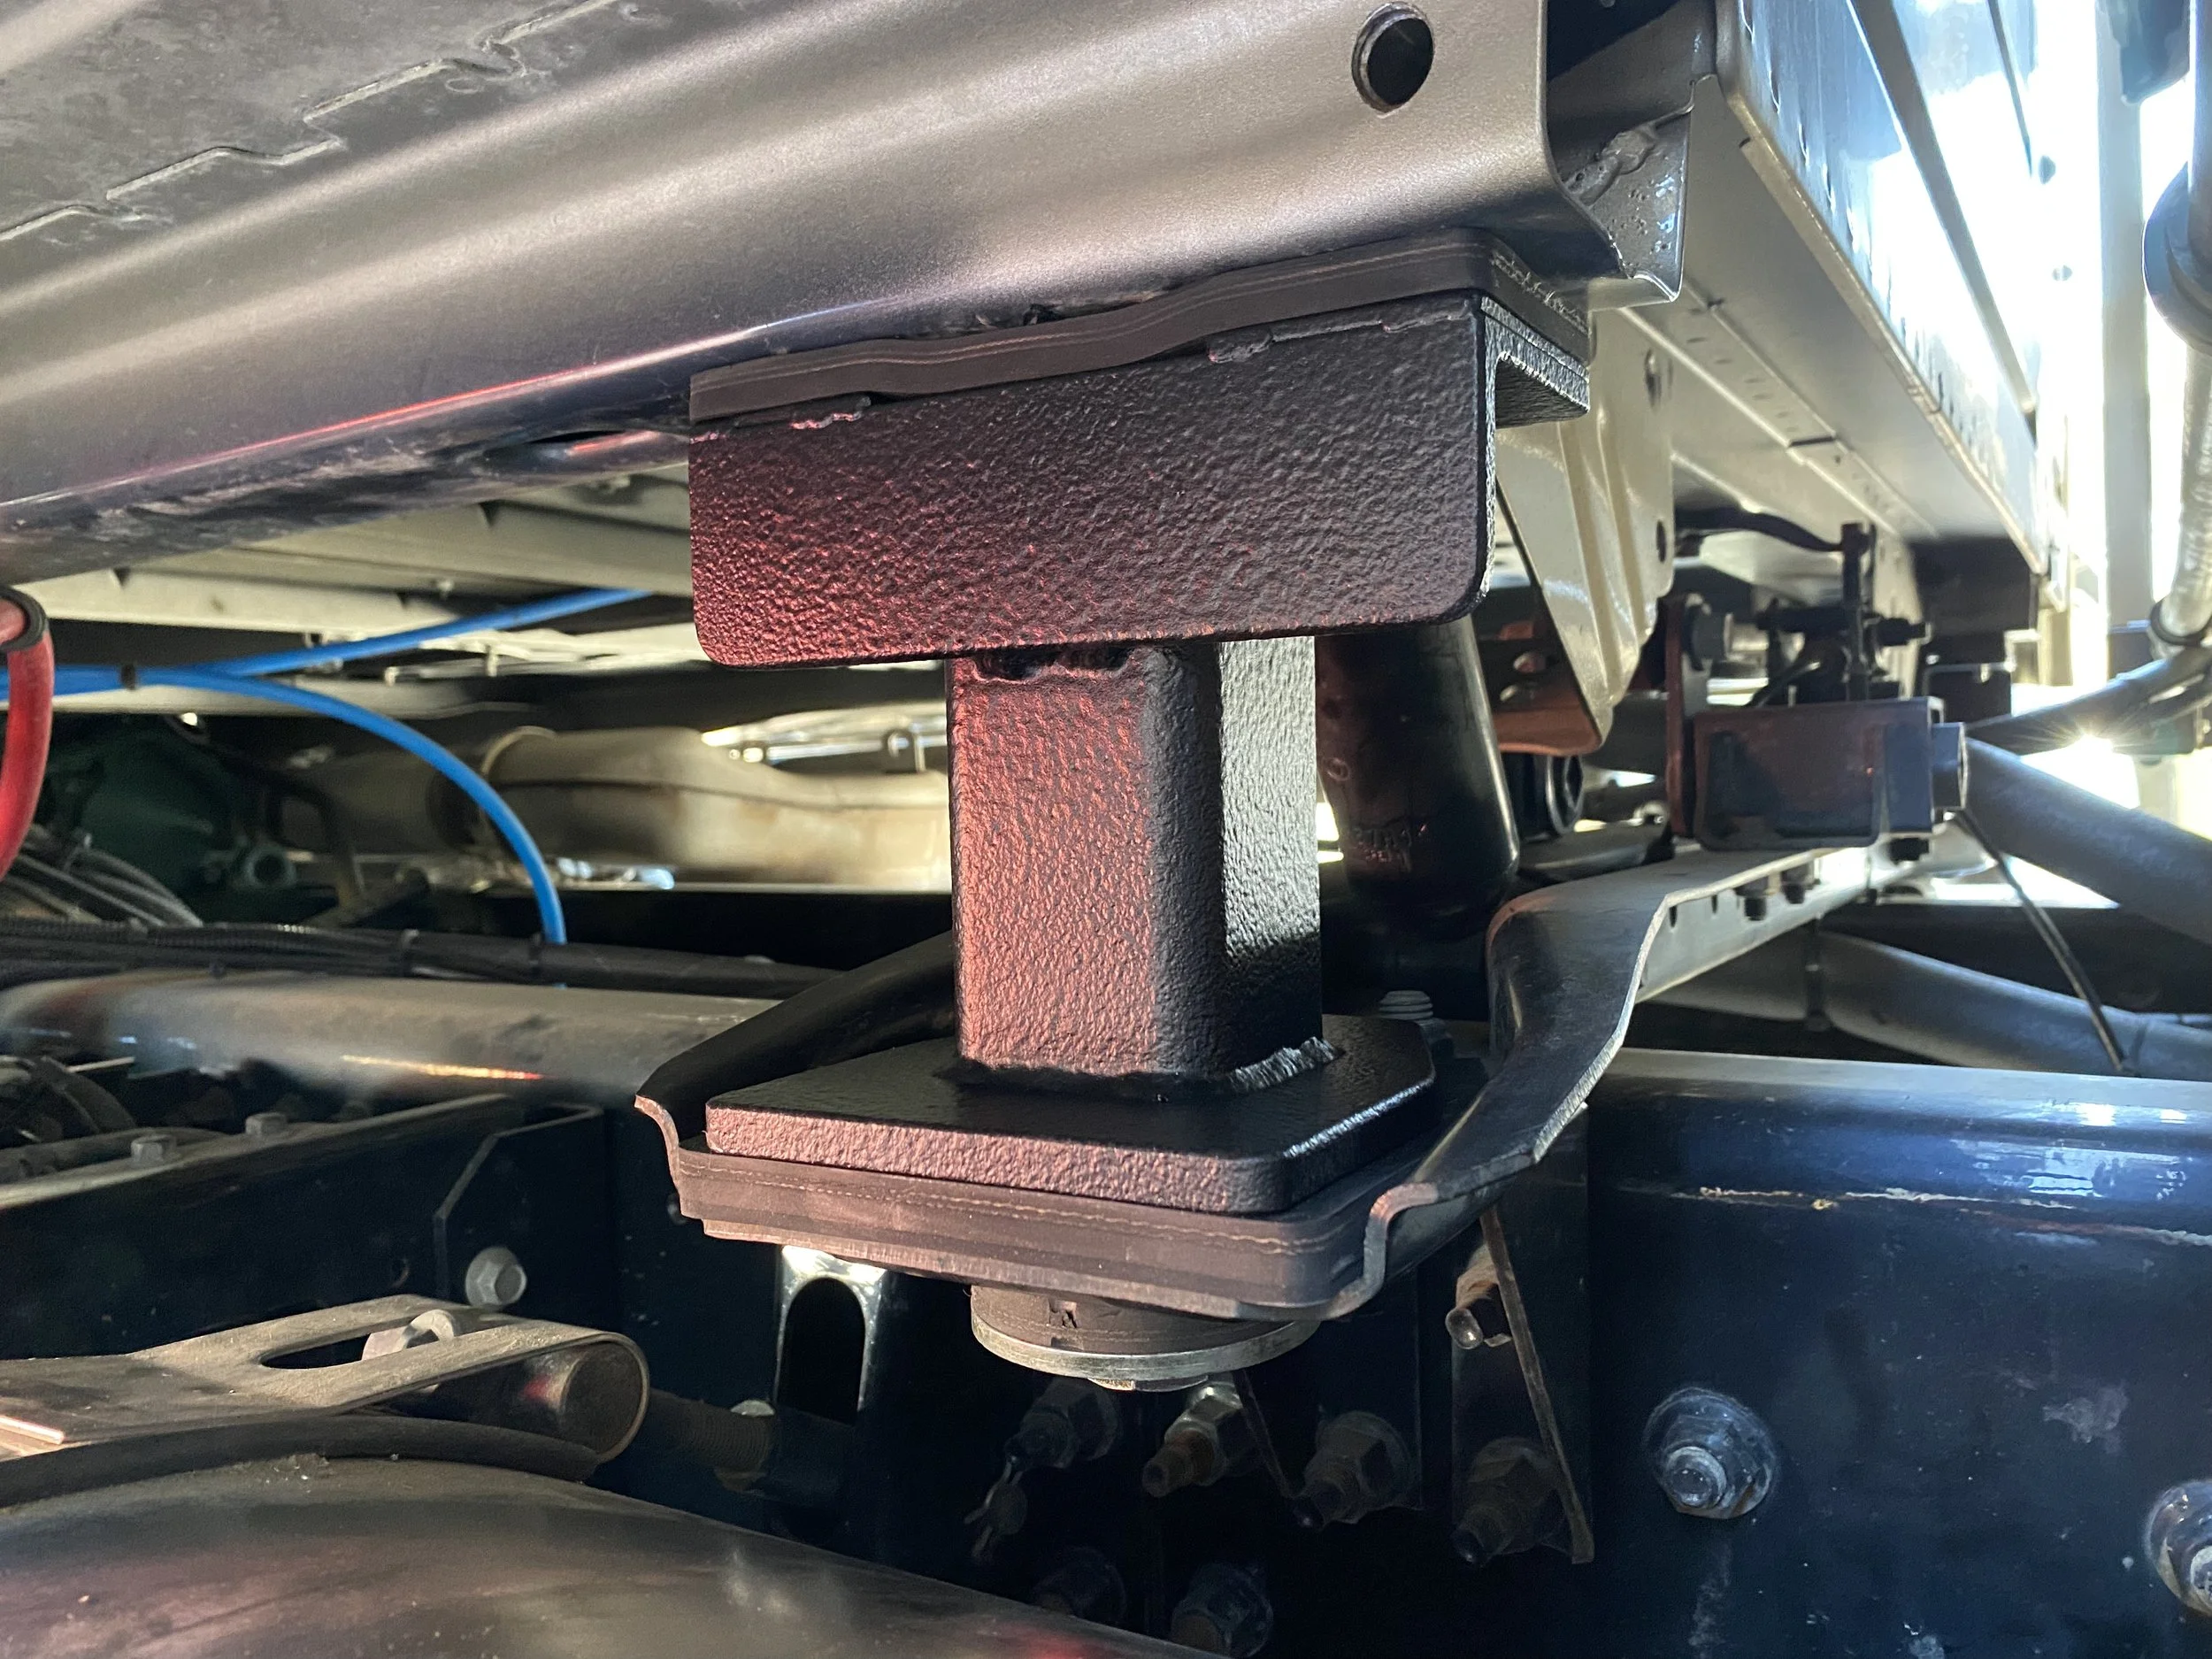
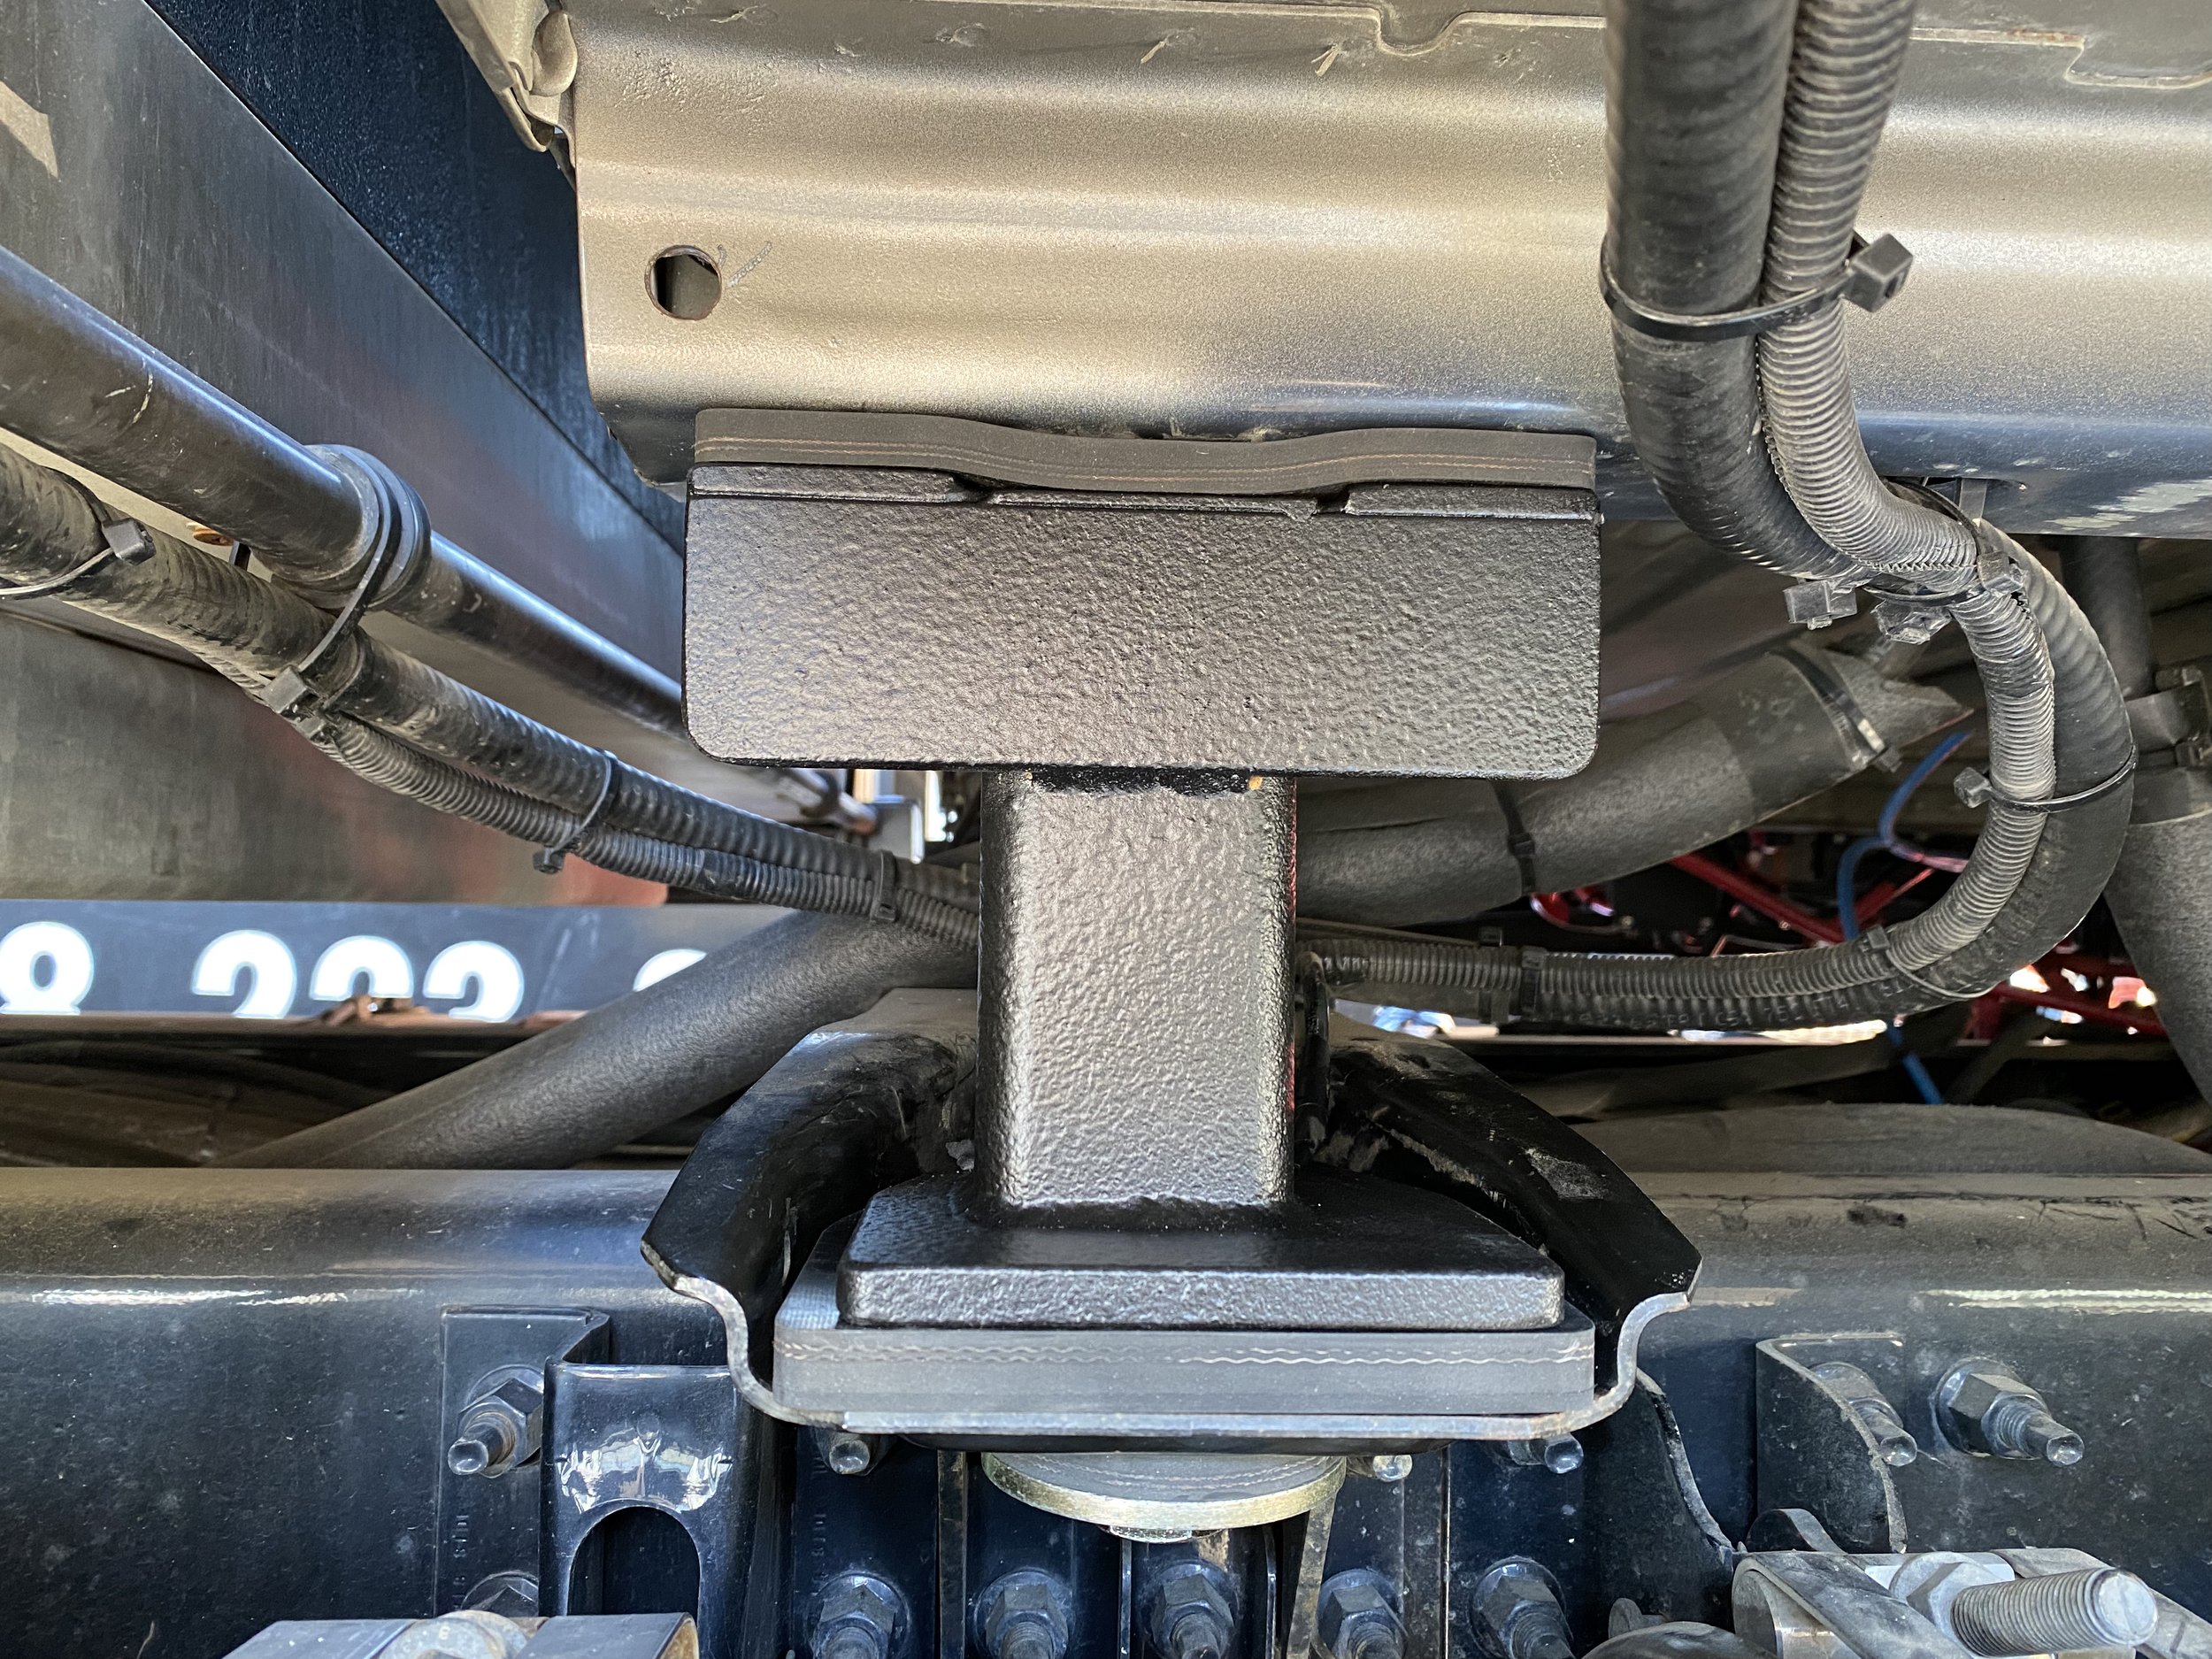
The mount consists of a base plate, top angle mount and the intermediary square tube post. The base plate was made from 3/8” thick steel plate, cut to shape on the table saw with a steel cutting carbide blade, and then dressed up on the belt sander. The top angle mount was made from 3” x 3” x 1/4” steel angle with one of the legs cut to 2” long. The centre post was made from 2-1/2” x 2-1/2” x 1/4” wall steel square tubing, cut to length on the table saw, and sanded square on the disk sander.


Step Three: Fitting The Mounts To The Truck
Our solid post mounts must both support the weight of the cab and prevent the cab from lifting off the frame when the truck drops into a depression or is thrust upwards when hitting a large bump. The bottom securing point is already ideal for our mounts, but the upper securing point needs modification.


Step Four: Finishing The Mounts
With the mounts tested and good to go, all that was left was to paint them and finish the install. We did have to add some steel shims to the top angle plate to account for a welded on spacer that Volvo has for the air spring. We didn’t want all the weight of the cab on that smaller surface area, and our shims would solve that problem. We also had to add an extra 1/8” full dimension shim on the passenger side post, as the cab height was different from one side to the other by that much, and we didn’t want to impart unequal forces when supporting the cab. We already had horizontal twist in the truck cab courtesy of Volvo’s production people and we didn’t want to add more twist to the cab in the vertical dimension as well. Over time, that vertical twisting force on the cab could see spot welds that hold the cab together start to break apart.
We did the painting of the mounts ourselves rather than have the pieces sandblasted and powder coated. The mounts are small, and minimum charges at both the sandblaster and powder coater would see us paying over $150 to coat the two pieces.


Conclusion
Well, all our work was certainly worth it. After traveling 8,200 kilometres in 18 days on our recent trip above the 60th Parallel, the new solid mounts made an incredible difference. Not only did they make the ride more comfortable, but we had much less fatigue at the end of the day because our bodies weren’t struggling all day long to brace us from being thrown about. Considering the only cost to us was our time to make the mounts, it was a huge win all around.