

Hydraulic Lifting Jacks
Taking The Load Off, and Levelling
One feature that we missed from our old motorhome was its levelling system. We could stop the rig and simply push a button on the dash, and the four jack computerized levelling system would automatically adjust each corner of the motorhome to make it level.
Our truck build didn’t include such a system, and this meant that any cabin levelling had to be done with pads or blocks placed under the tires. Much of the time we could get the cabin level by just moving the truck a bit this way or that. But sometimes it required a lot more.
The other advantage of a powerful levelling system is that the jacks can be used to lift the corner of a vehicle in order to change a wheel in the case of a flat tire. We did do this on one occasion with our 22 ton motorhome, at 1:30am, at a truck stop in southern Nevada. Boy, did we appreciate those levelling jacks that night.
Because of the hill, getting the tires up on this many blocks needs the assistance of the hydraulic front drive axle.
During our recent Trans Canada Odyssey, we spent sixty nights camping along the route. All but five of those nights were spent wild camping in various locations from Walmart parking lots to hilltop clearings in the middle of the remote wilderness. In almost all of those locations we were able to level the cabin with no more than one or two 1” levelling plates. Most times we needed none. So it came as an amusing irony that when we did pay to stay in a proper RV park, so we could hook up to do laundry etc., the site that we occupied required eight inches of stacked plates and blocks to get us level. When this amount of stacking is needed, it can actually get dangerous. Depending on the slope of the land, a heavy truck can slide off the stack and come crashing down. Sometimes, just trying to get the truck to climb up on top of the pile can see the wheel spin and fire a block or plate out from under the vehicle at high speed.
What We Thought would be a simple solution
Since levelling systems are available on almost every type of motorhome or fifth wheel trailer, no matter the cost, we thought it would be easy enough to just contact the manufacturers and order the parts. But after calling the company that made the system in our previous coach, as well as several other of the big name levelling system companies, we learned that they do not sell to the after market. They only engineer systems for specific motorhome manufactures as an O.E.M. product.

After some searching around, which included talking to some truck crane companies that could provide us with components for around $15,000.00, we happened upon Big Foot Levelling Systems manufactured by Quadra Manufacturing in White Pigeon, MI. They make aftermarket systems that range from fully automated systems for large Class A diesel pusher motorhomes, down to manual systems of only one or two jacks. We didn’t have the available frame space at the front of the truck for a four jack automated system, so settled for a manual two jack system for the rear of our truck. This is where we needed the levelling anyway, and these 17,000 pound jacks would give us enough power to lift the 28,000 pound rear of our truck completely off the ground. This would help with rear wheel changes as well, as this is the really heavy part of the truck that makes using a bottle jack a real pain. Especially since getting a bottle jack under a rear axle means crawling in under the truck from the rear, some five feet. We’ll still need to use a bottle jack on the front axle. But this is easy as we have full access to the front axle by simply tipping the engine hood forward.
System Purchase and Installation
All the components for our system including wiring and hydraulic hoses.
It only took a few emails and a phone call to Quadra Manufacturing to determine the correct jack size and length for our rig. The price for our entire system including two control panels, one for the rear of the truck and one for in the truck cab, came to slightly more than 10% of the crane truck company parts, so we were very happy about that.
In order to install the jacks on the truck frame we had to manufacture two brackets that would mount to the truck frame. This would then accept one of the bolt flanges on the cylinders. The other bolt flange would attached to the existing drop plates that we installed when the truck was built in order to protect the front drive axle hydraulic pack, and provide a mount for the rear bumper and trailer hitch. All we had to do was to drill some holes in the 1/2” plate steel.
Build Sequence


The first job was to manufacture the frame brackets out of 4'“x4”x1/2” thick angle iron. Part of the bracket goes up the side of the frame rail, and the other part goes under the frame to provide the lifting force.
The frame brackets mount to the frame in front of the large side plates, and just behind the suspension air bags.
Two bolts go through the frame rails and enter the bracket from behind it. Then the lower edge that goes under the frame is clamped to the bottom part of the frame channel.
Three 1/2” holes had to be drilled into the 1/2” side plates. A painful task considering the close quarters in which the work had to be done. We didn’t want to remove the rear tires.
Truck frames cannot be drilled or welded on the horizontal legs of the channel. This would cause the frame to crack over time. So to keep the bracket from flexing outward at the bottom when the jack extends, the return that goes under the frame channel is clamped to the channel horizontal leg with a plate and bolts.
The jack cylinder weighs about sixty pounds, so it’s too heavy to lift up into place by hand, and hold there while the bolts are installed. So the truck’s bottle jack was put to good use to do this.
Once the bolts were installed I could get underneath on a creeper to tighten them up properly.
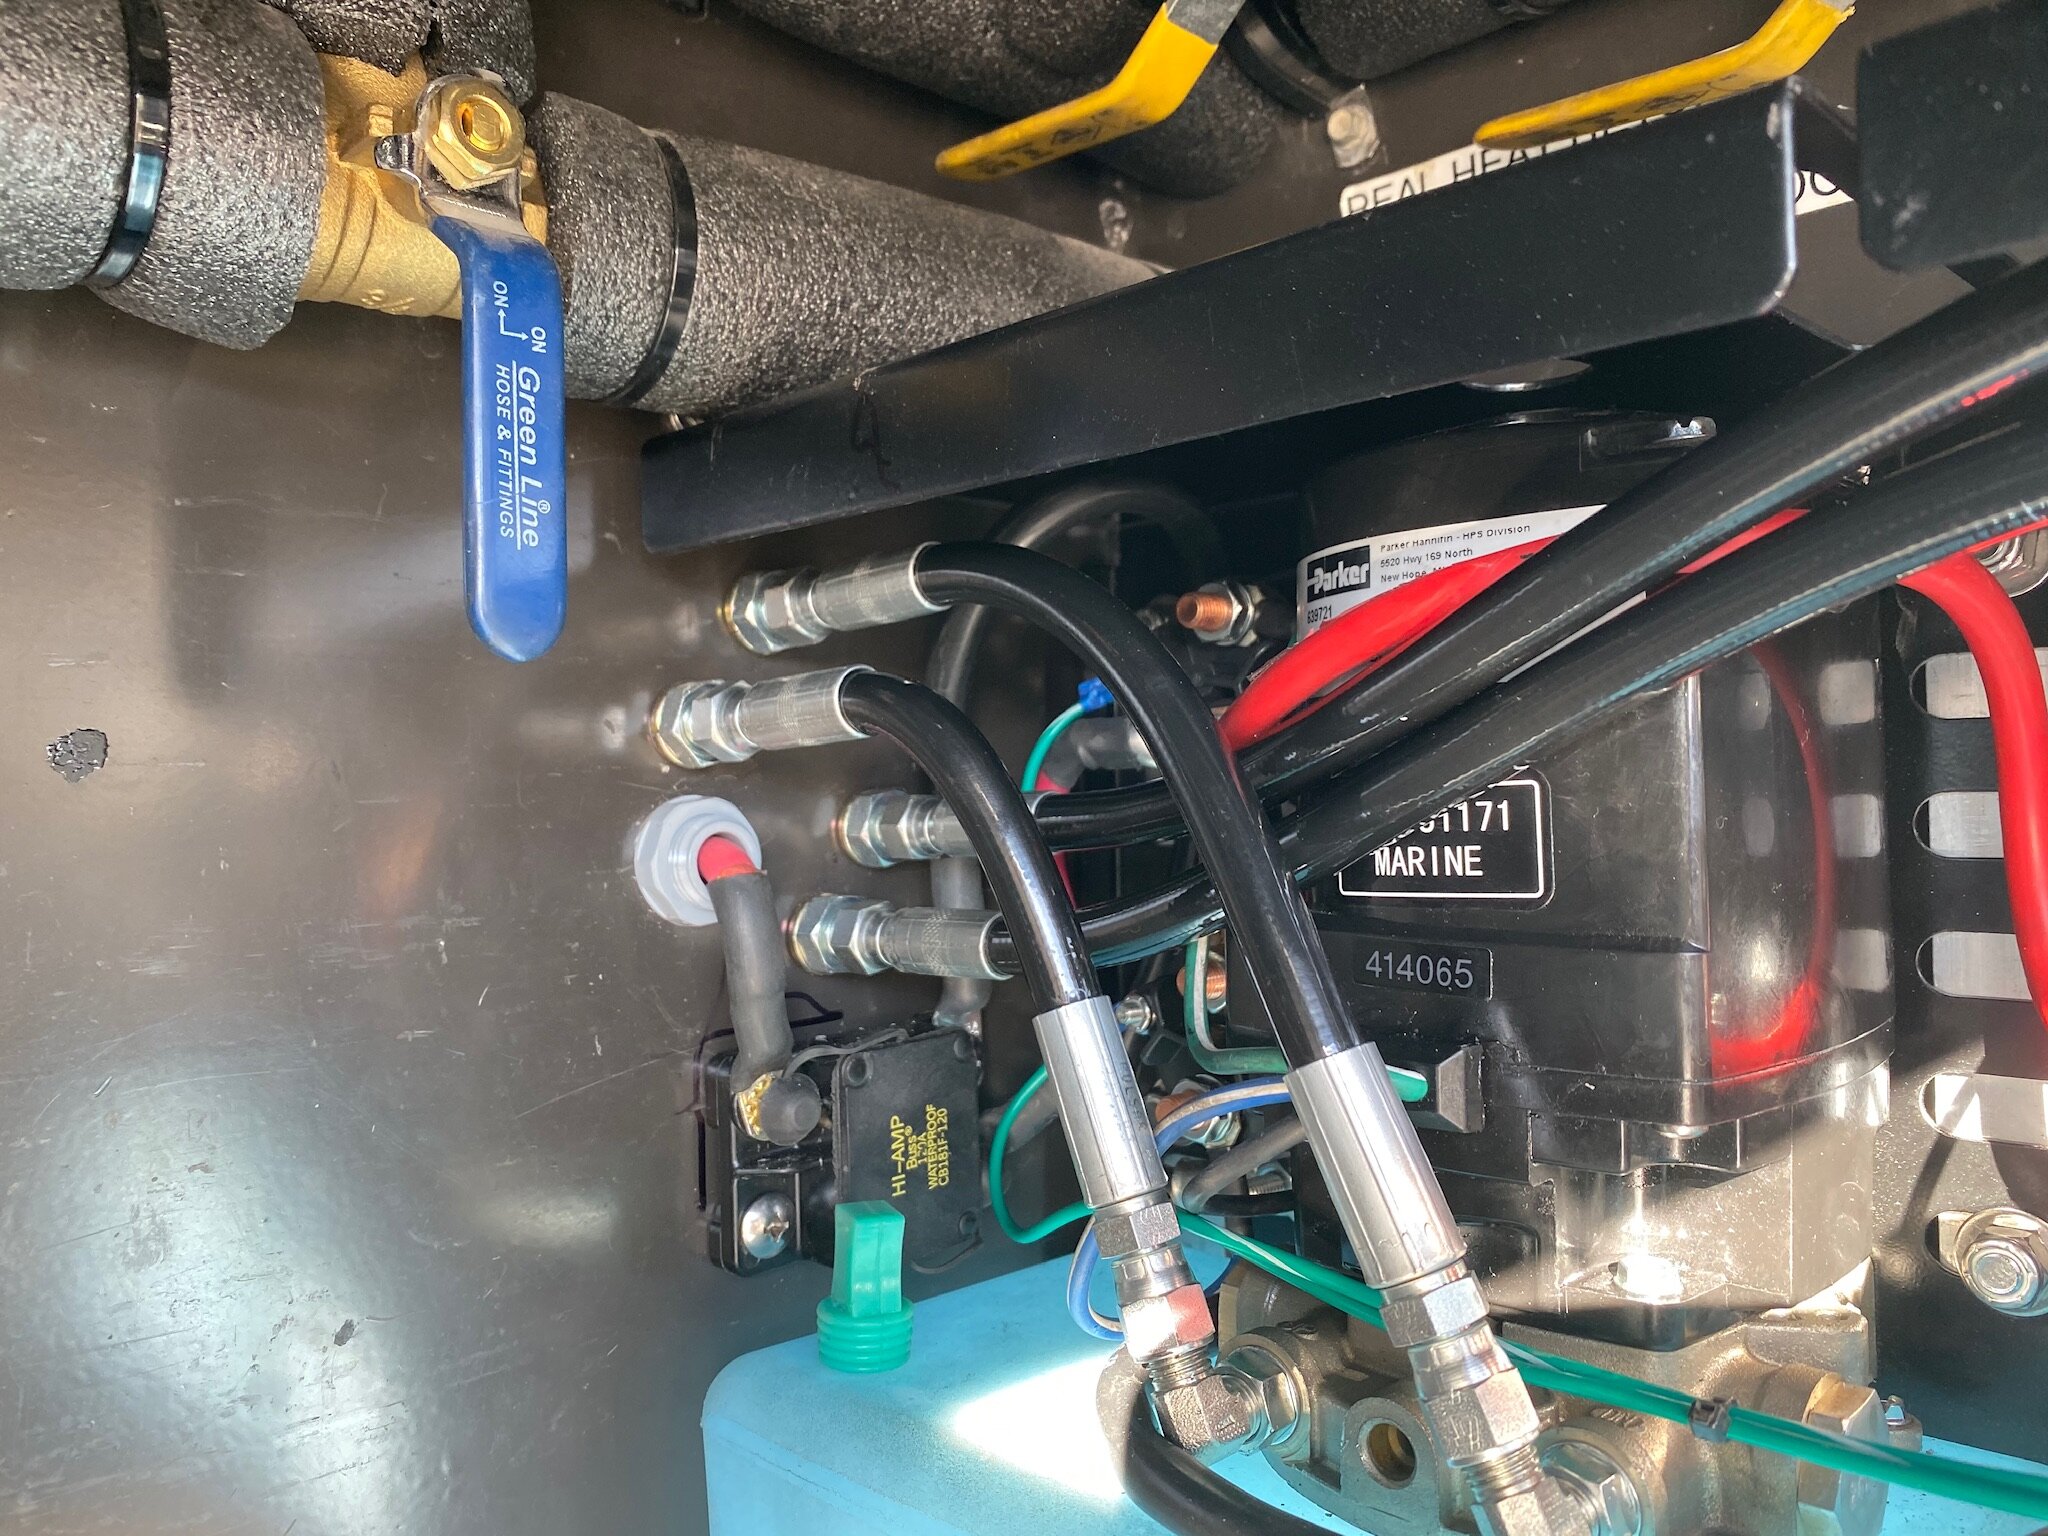
With the hydraulic jacks installed, it’s now possible to run the hydraulic lines and electrical wiring. Each cylinder has it’s own pump and reservoir, and each unit is wired separately into the control box.
The two hydraulic packs for the jacks fit perfectly into the right rear storage compartment. Since we’ll have jacks for levelling, we won’t need as many blocks and pads, and this frees up room in the compartment.


The two hydraulic packs had to be shimmed out from the wall because of the screws on the back that holds the components in place. To do this I used some 1/4”x1” aluminum flatbar, and held it in place with two sided tape. The bolts that would hold the hydraulic pack to the wall would pass through this flatbar.
With the hydraulic lines attached inside the storage compartment, and the connection fittings through the compartment wall, the outside hydraulic lines to the cylinders can be installed.
Since the cylinder came from the factory full of oil, when the plugs were removed to install the fittings and then the hoses, I had to keep the oil from leaking out and onto my lap. I used a levelling pad to deflect the oil stream onto a wad of paper towel.


The last thing to do was to wire in the microswitches that tell us when the jacks are retracted, and wrap the hydraulic lines with a spiral plastic armour, and the wire with split loom so everything is protected from sharp flying rocks kicked up by the tires.

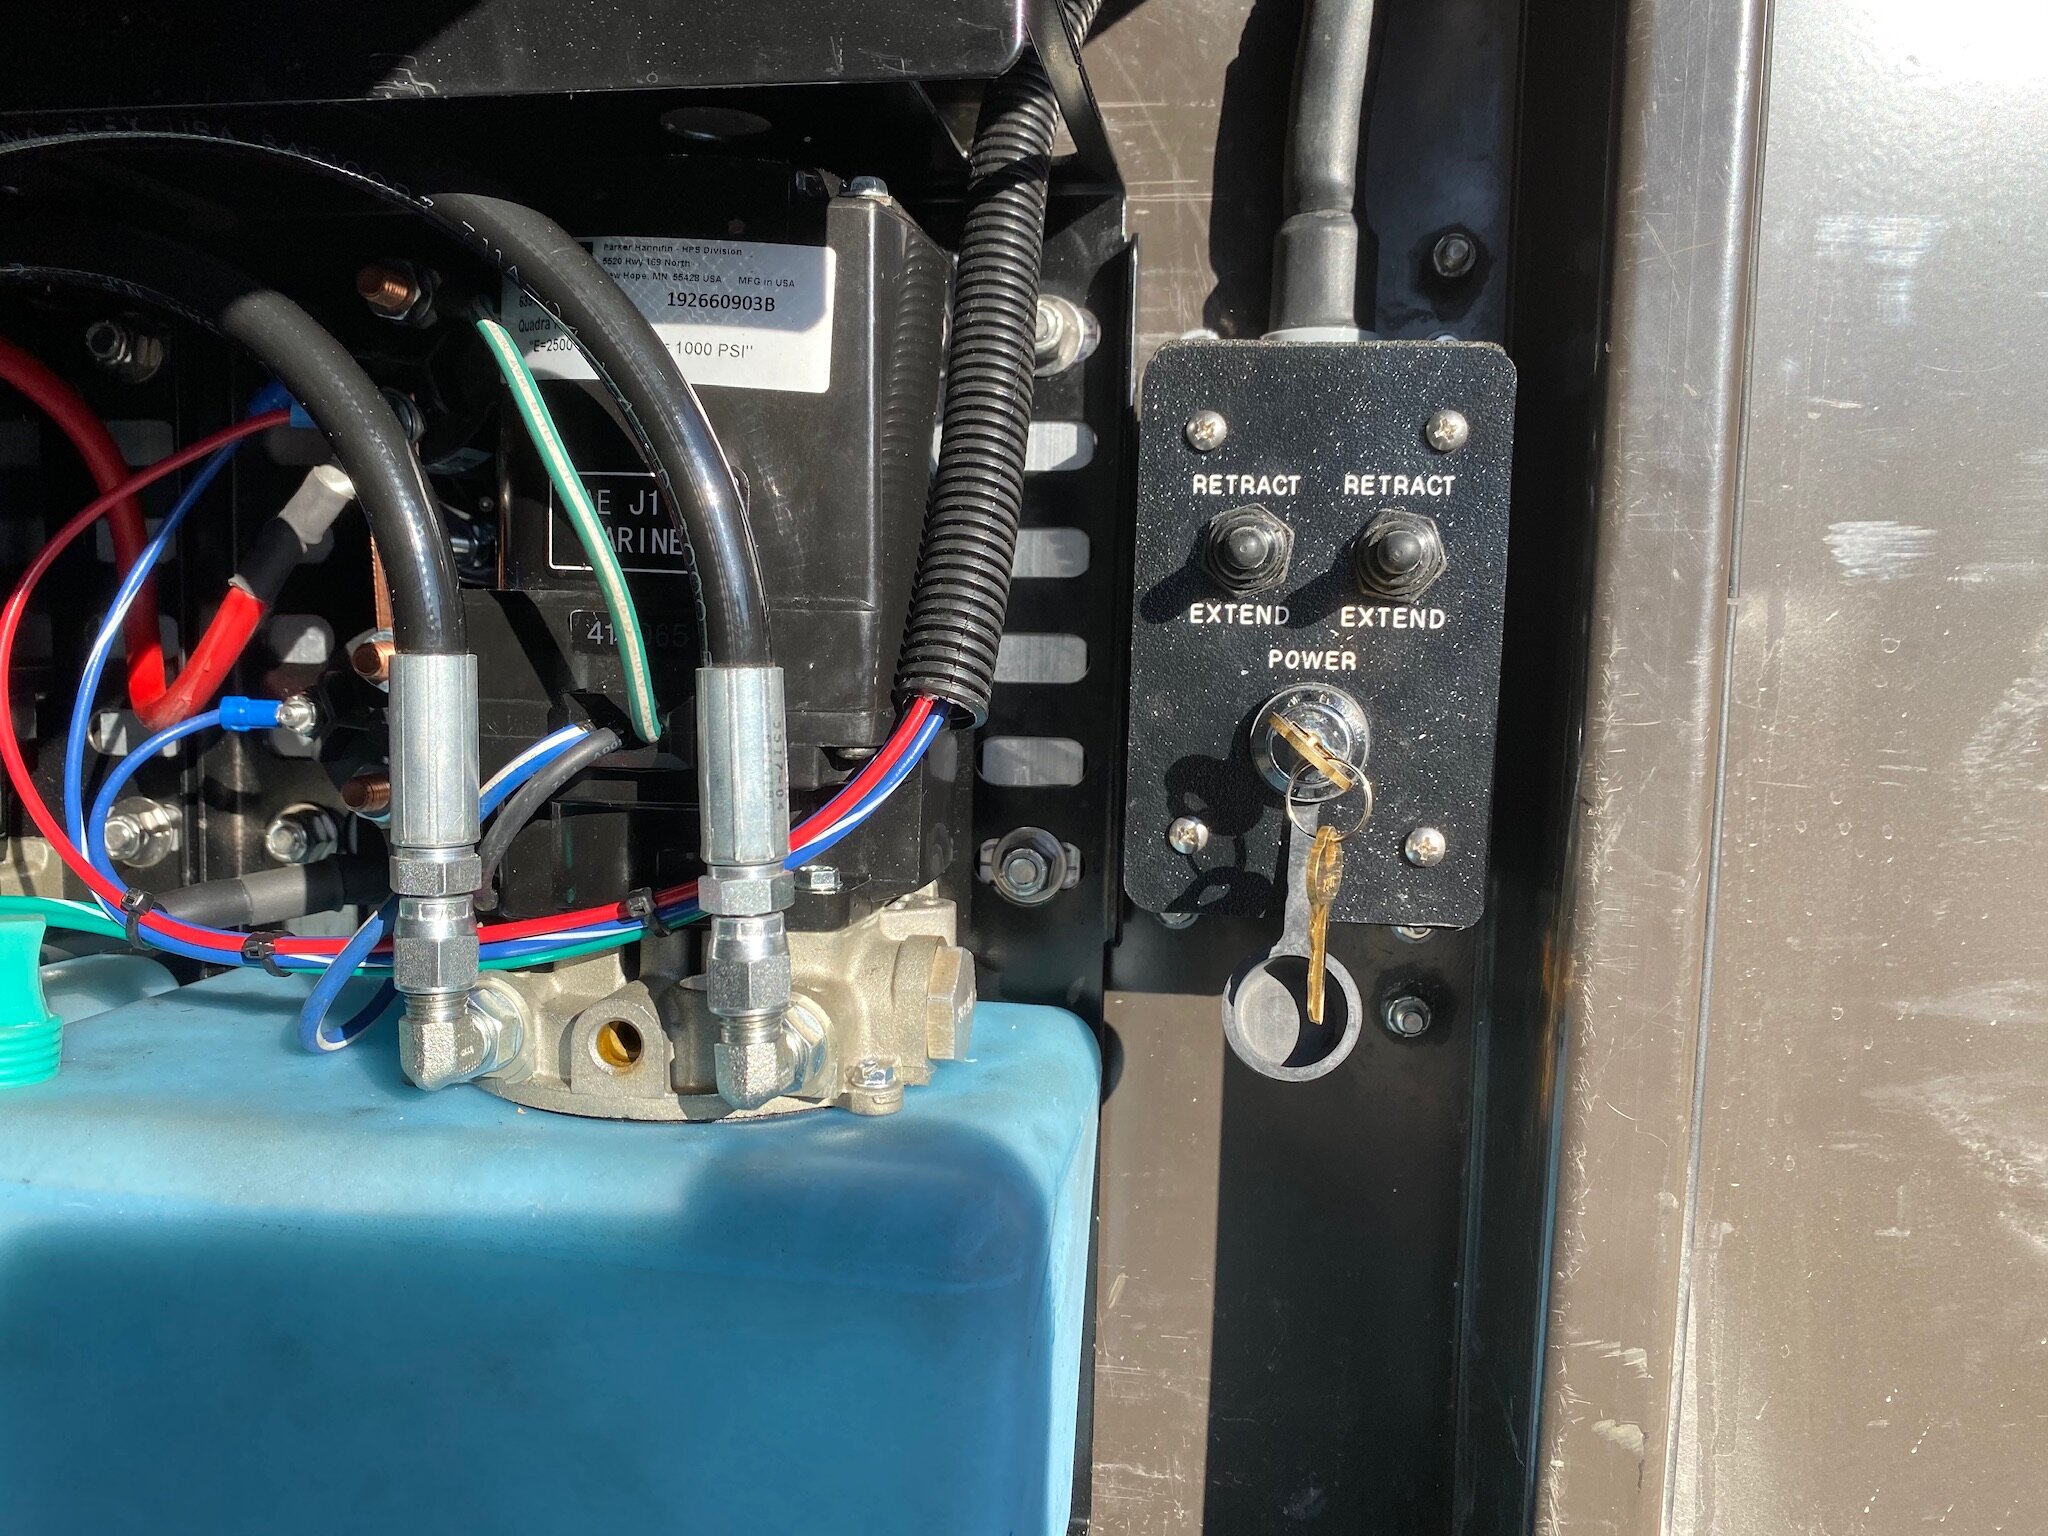


With the hydraulic packs all plumbed and wired, it was just a matter of adding the hydraulic oil (transmission fluid) and turning on the system. Each cylinder was extended and retracted the full distance to clear out any air in the system.


It’s always nice to have something work as described when the job is all finished.
With the job done, all the kit is put back in their storage locations with four less blocks.